OpenID4VCI - Issue Credential (Deferred)
In many real-life situations, a credential isn't immediately available when requested, often due to time-consuming business processes happening in the back office. In these cases, deferred issuance is used. Here's how credentials are issued on a deferred basis using OpenID for Verifiable Credentials Issuance (OID4VCI). The process involves the following key stages:
Create Credential Definition: This stage consists of two main sub-steps:
- Define: The credential parameters and rules are established.
- Prepare: All necessary information and infrastructure are set up for issuing the credential.
Deferred Issue: Once the credential definition is created and prepared, the issuance is deferred, allowing for any pending business processes to be completed. The credential will be issued only after authorisation or pre-authorisation is completed (as indicated by the transaction code, Txn_Code).
Issue Credentials: After the authorisation step, the credentials can be issued to the holder. At this stage, it's necessary to configure the holder's wallet endpoint to complete the credential transfer.
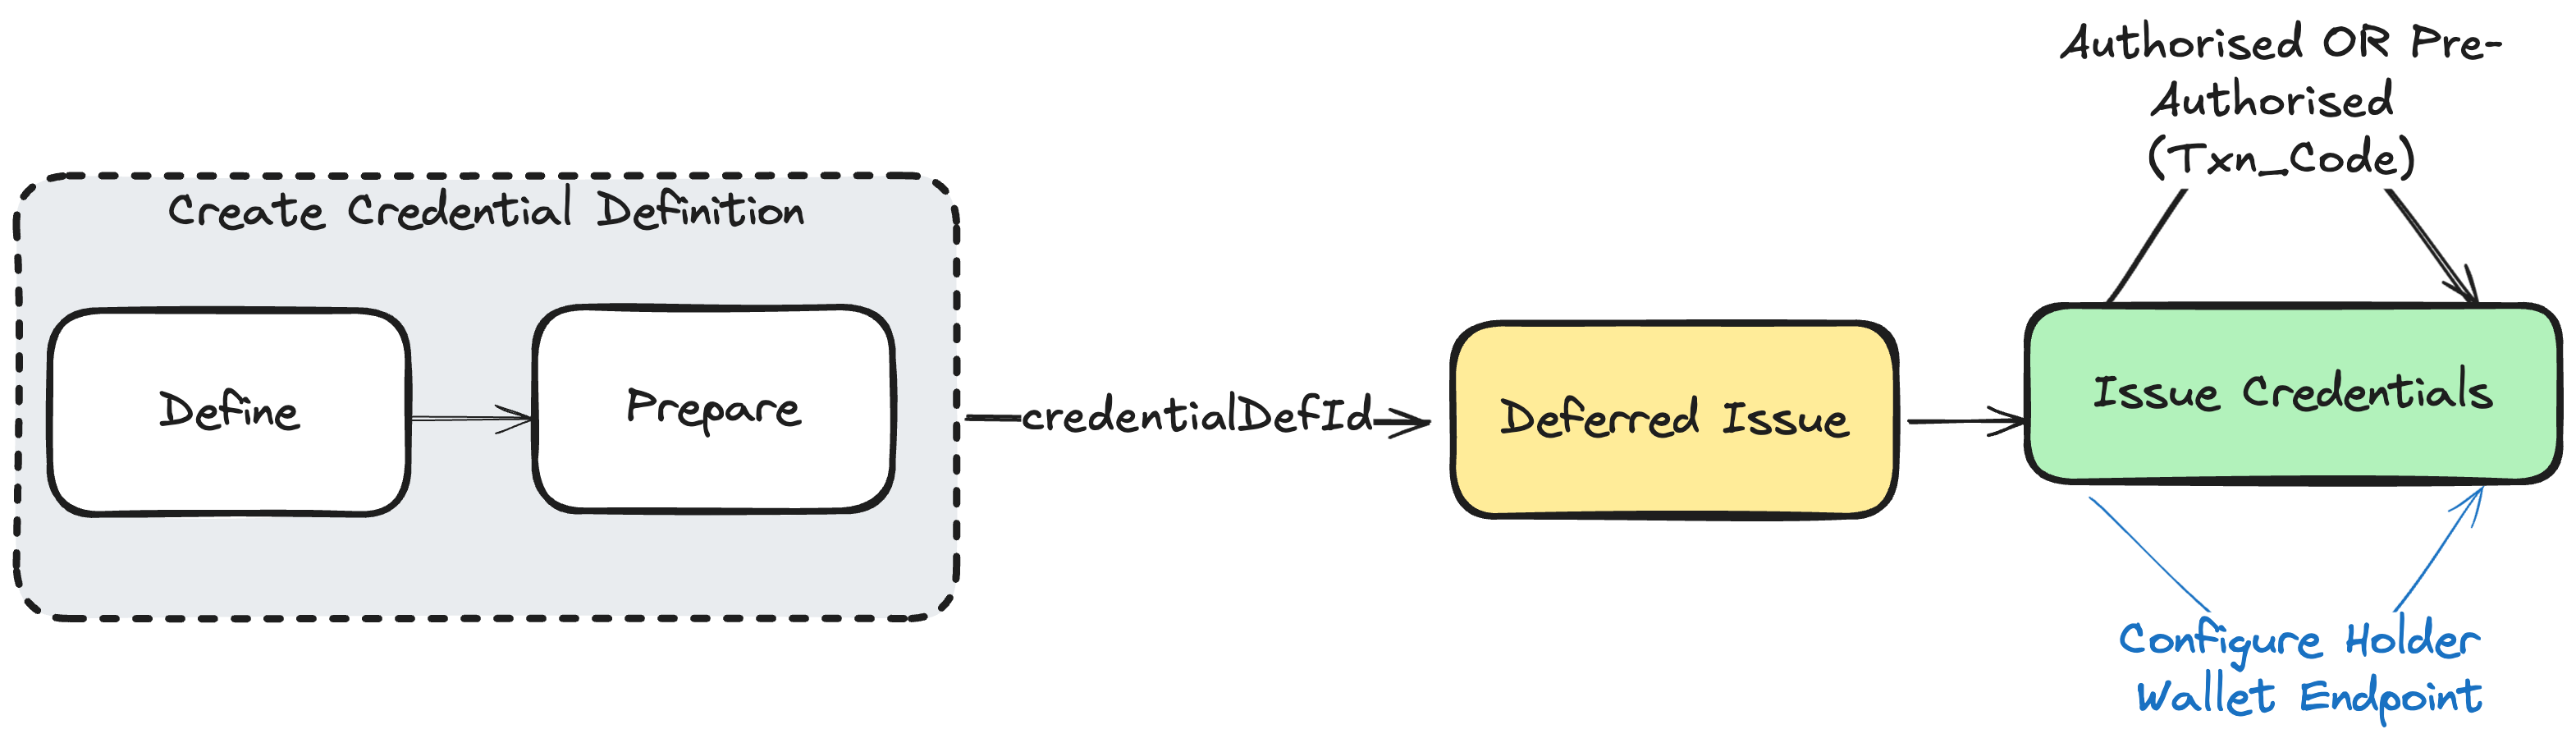
The image illustrates this deferred process, where the issuance of the credential happens after a delay, once the back-end processes and authorisation steps have been successfully completed.
Step 1: Get the API Key (Issuer Admin)
To obtain your API key, please contact [email protected]. Once you have received your API key, enter it in the field below and click the Set API Key button to save it for future use.
Step 2: Create Credential Definition (Issuer Admin)
To create a credential definition, run the code block below using the Run button. Alternatively, you can manually copy the code block and use it in the body of the API request available here. From the API response, copy the credentialDefinitionId for use in Step 3. Credentials can be issued in any of the following formats:
Request
Response
credentialDefinitionId can be reused to issue multiple credentials (Step 3).Step 3: Issue Credential (Issuer)
The holder of the wallet submits a request for the issuance of a credential by executing the JSON code block below using the Run button in Deferred issuance mode. Choose the credential format and replace <credentialDefinitionId> with the actual ID obtained from the previous step. Alternatively, you may use the API available here.
After receiving the response, toggle the button provided to dynamically generate a QR code. The EUDI Wallet/Holder can then accept the credential offer using the Data Wallet (or any other EU Digital Identity Wallet) by either scanning the QR code or directly accessing the credential offer on their mobile device, such as via a browser.
Request
Response
From the API response, copy the credentialExchangeId and the credential.id for use in the next step. The credential.id corresponds to the id field from the credentialDefinitions array in the create credential definition response. Note that the credential.id is not returned or required if the credential format is DRAFT_11.
Step 4: Update Credential Offer and Receive (Issuer/Holder)
Once the request is received and the necessary validations are completed, update the credential offer by executing the code block below using the Run button.
Alternatively, you can manually copy the code block, replace the placeholders, and use the credentialExchangeId from the response as the path parameter in the API request available here.
Path Parameter
Request
Response
Try It Yourself (With Demo Video)
Watch the below demo to learn issue credential API and try it out yourselves:
W3C VC JWT / SD-JWT Credential Format
Deferred Credential Issuance Demo: Learn how to issue credentials in deferred mode using OpenID4VCI protocol with iGrant.io Digital Wallets.