Passwordless Login with EUDI Wallets
Overview
By enabling the OpenID Connect extension in the iGrant.io Organisation Wallet Suite and configuring any OpenID Connect-compatible Identity and Access Management (IAM) system as a relying party (RP), organisations can allow users to log in without a password using their digital wallet credentials.
This guide consists of two parts:
- Enable and configure the OpenID Connect extension in your iGrant.io Organisation Wallet Suite.
- Configure your IAM to use iGrant.io as an OpenID provider with step-by-step guides.

Pre-requisites
Before implementing the passwordless login flow with EUDI Wallets, ensure you have:
- An iGrant.io Organisation Wallet Suite with administrator access
- EUDI Wallet available for testing the authentication flow
- A Presentation Definition ID (create one here)
- A running IAM instance that supports OpenID Connect (e.g. Keycloak 15+, Auth0, Ping Identity, etc.)
Part 1: Configure the OpenID Connect Extension
Step 1: Get the API Key (Organisation Admin)
To obtain your API key, please contact [email protected]. Once you have received your API key, enter it in the field below and click the Set API Key button to save it for future use.
Step 2: Enable the OpenID Connect Extension
To enable the OpenID Connect extension, run the code block below using the Run button. This will enable the extension and provide you with the OpenID Connect metadata discovery URL (/.well-known/openid-configuration), copy it for IAM configuration (Step 4).
Request
Response
Alternatively you can do this step manually by copying the code block and using it in the body of the API request available here (select https://demo-api.igrant.io from the Base URL dropdown). Copy the OpenID Connect metadata discovery URL (/.well-known/openid-configuration) for IAM configuration (Step 4).
Step 3: Create an OpenID Client
You will need the Presentation Definition ID you created in the pre-requisites, as well as the following from your IAM:
- Redirect URI
- Allowed origin (based on the redirect URI's domain)
Run the code block below using the Run button to create an OpenID Connect client. This will provide you with the Client ID and Client Secret, copy them for IAM configuration (Step 4).
Note: If you don't already have the Redirect URI it can be updated later and left blank for now, see the IAM-specific section below for instructions on where to find it.
Request
Response
transactionDataAction: A free-text value (e.g."Log in to your online bank account") included in the transaction data sent to the EUDI Wallet when the presentation definition supports it. The wallet may use this to display a custom UI to the user (e.g. a contextual message about what the login is for).callbackURI: An HTTPS endpoint on your service that receives the credential presentation once the user has presented their credentials. Your callback must return a JSON response with asubfield, the subject identifier used to link the user in your IdP (for example, by extracting theemailfield from the presentation).callbackSecret: A secret used to sign the callback payload with HMAC-SHA256. Use this to verify that callback requests genuinely originate from iGrant.io. See Webhook Security for details on how to decode and verify theX-iGrant-Signatureheader.
Part 2: Configure Your IAM
Organisations can configure iGrant.io as an OpenID provider in any OIDC-compatible IAM. Below are step-by-step guides for Keycloak and Auth0.
Keycloak Configuration
Follow these steps to configure Keycloak as a relying party.
Step 4: Add an Identity Provider (IdP)
- Log in to your Keycloak admin console.
- Navigate to Identity providers > Add provider > OpenID Connect v1.0.
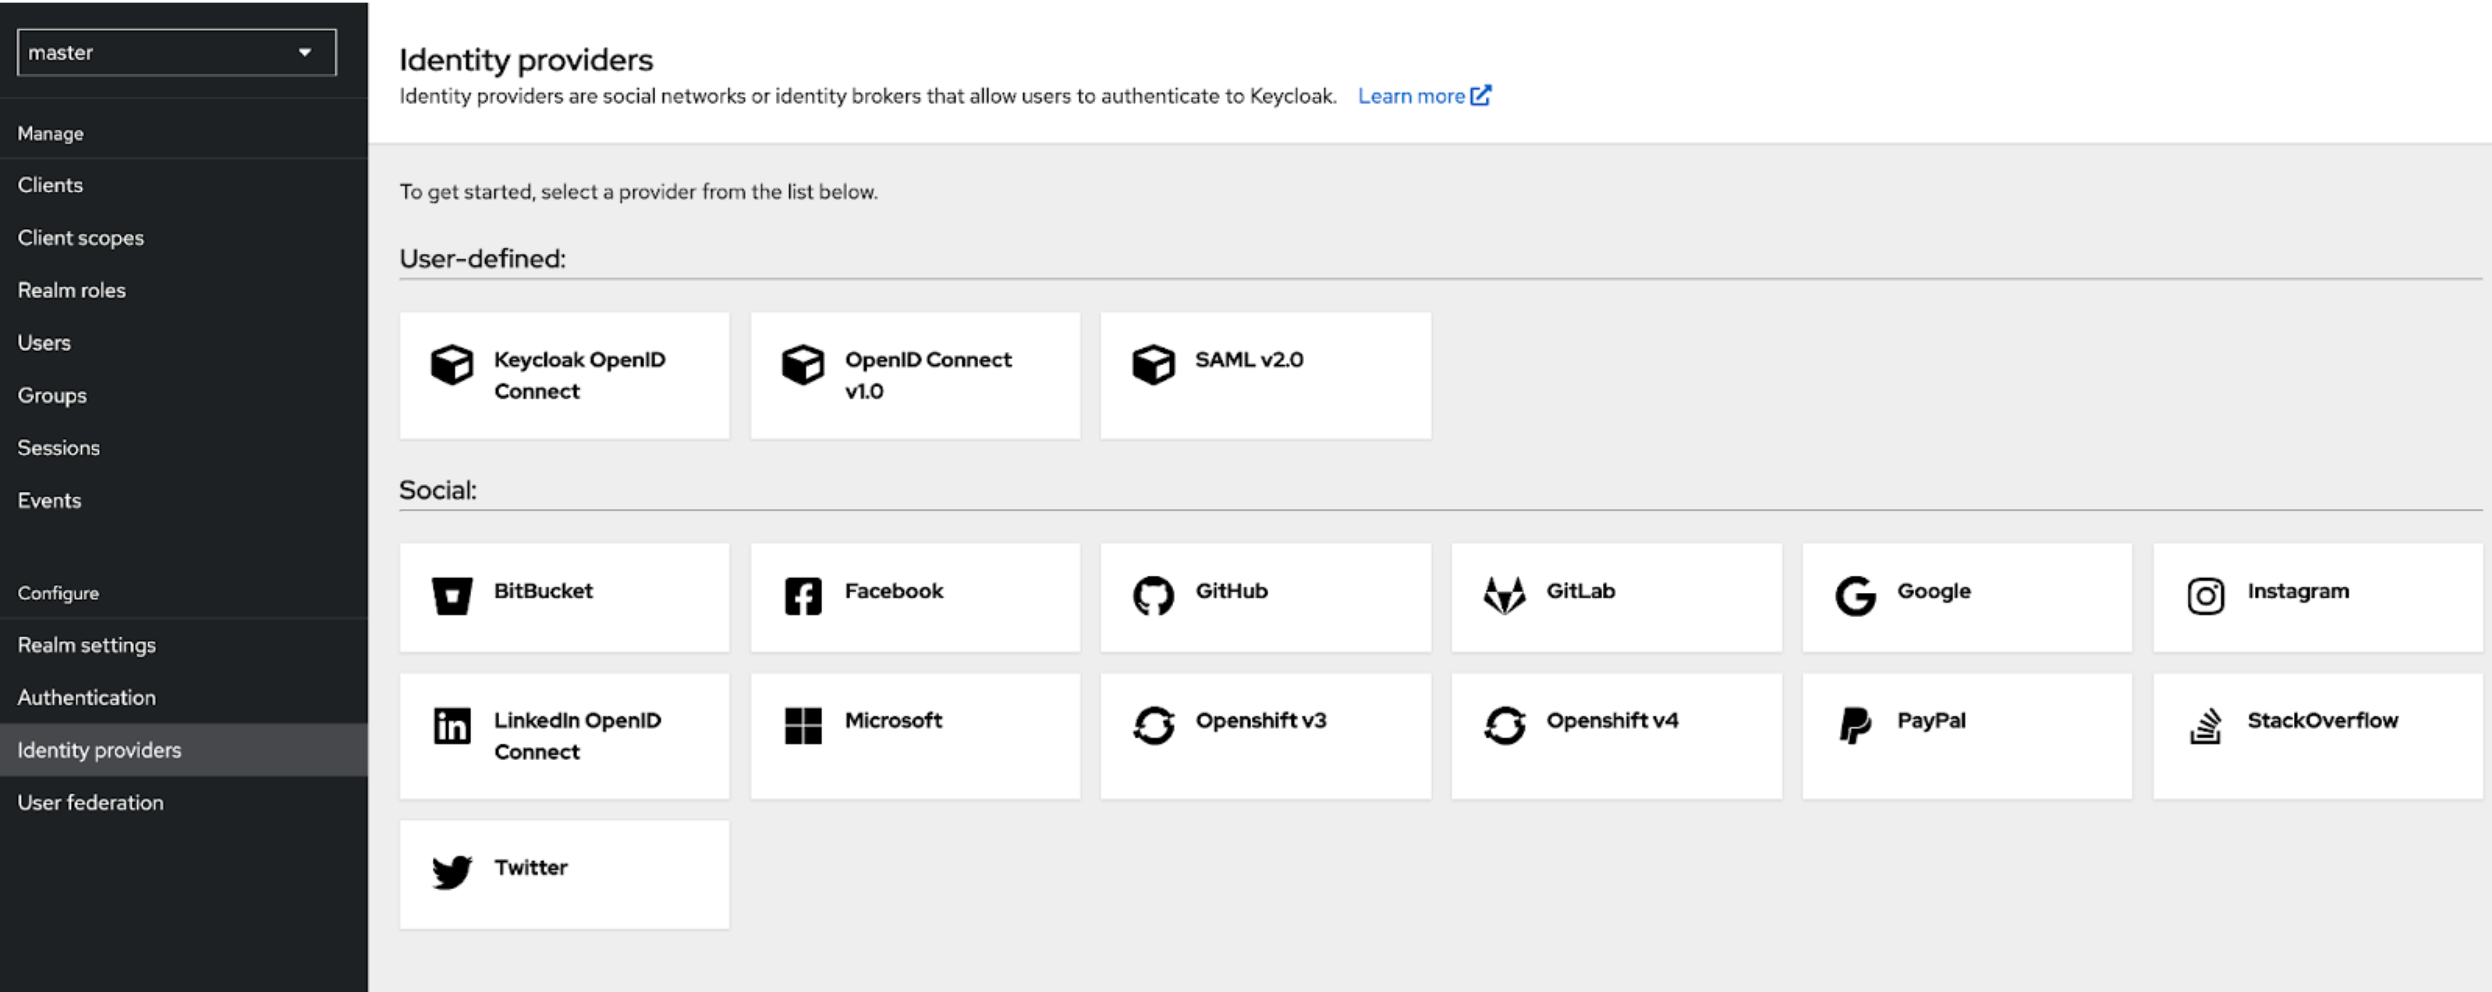 Figure 01: Add Identity Provider
- Enter the following details:
- Alias: e.g.,
igrant - Client ID: (from step 3)
- Client Secret: (from step 3)
- Discovery endpoint: Paste the metadata discovery URL from step 2
- Client Authentication: Set to Client Secret sent as basic auth.
- Alias: e.g.,
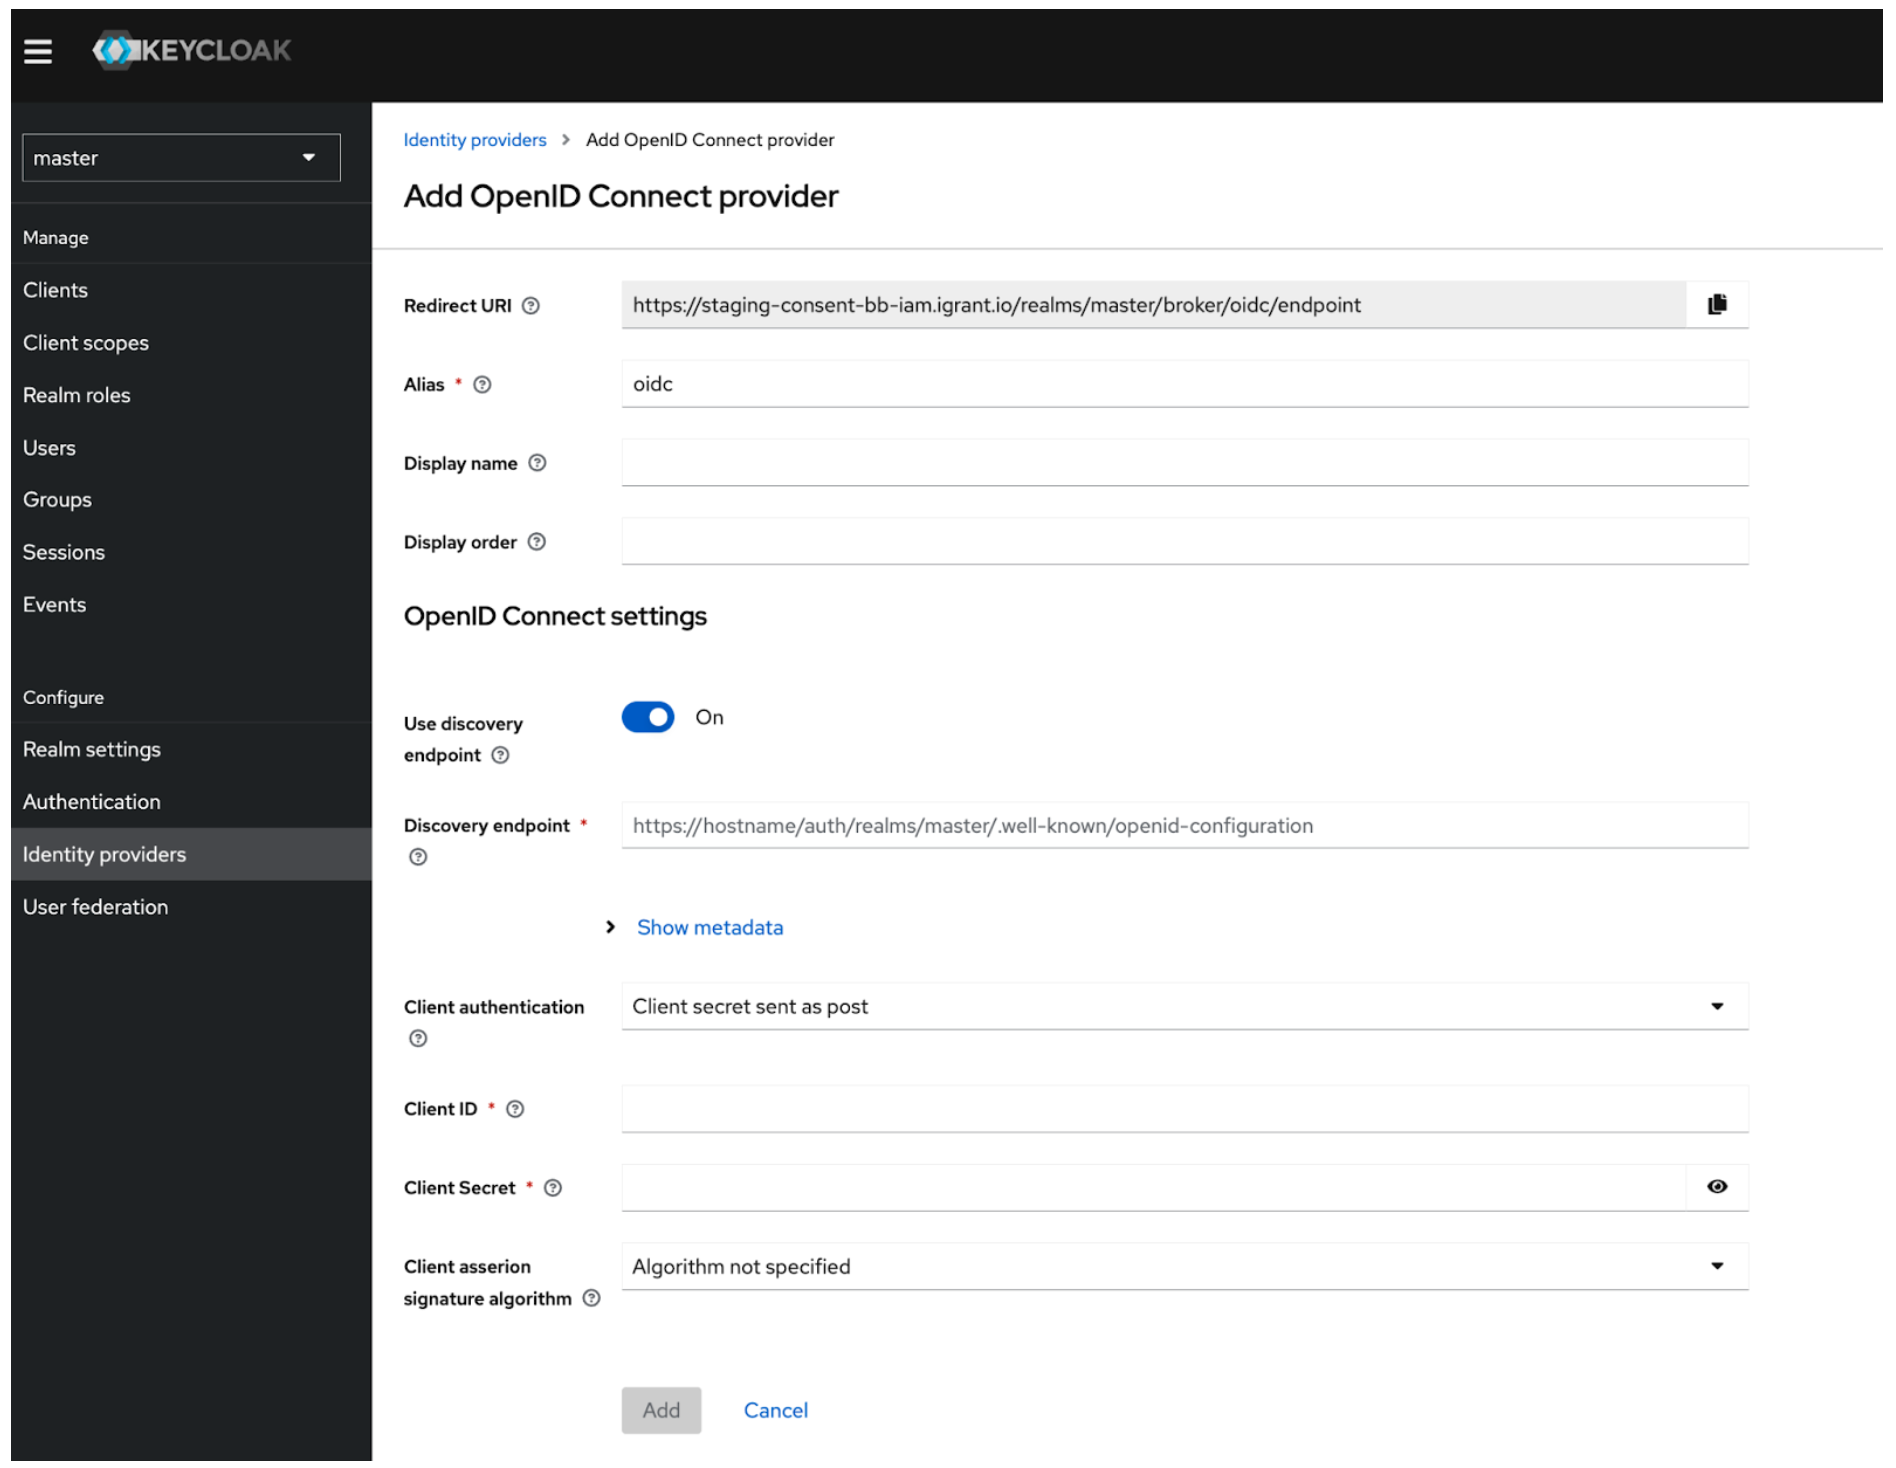 Figure 02: Add OpenID Connect Provider
If the discovery endpoint cannot be used directly, retrieve individual endpoints (authorisation, token, userinfo, and JWKS) from the metadata URL (Step 2) in the browser and configure them manually.
Note: You can find the Redirect URI in the settings, update the client here if not already done.
Step 5: Add Mappers
- Navigate to the Mappers tab in the newly created Identity Provider.
- Add a new mapper (or several).
 Figure 03: Mappers tab
- Select Attribute Import as the Mapper type.
- Enter the following details according to your Presentation Definition (e.g. mapping the local
usernameto anemailclaim):- Name: "Username" (or any name you prefer)
- Sync mode override:
Inherit - Claim:
presentation.email(or any other verified claim defined in the Presentation Definition) - User Attribute Name:
username(local attribute)
 Figure 04: Add a mapper
Step 6: Create a Custom Authentication Flow in Keycloak
- Go to Authentication > Flows.
 Figure 05: Authentication
- Create a new basic flow, e.g., "Login with EUDI Wallet".
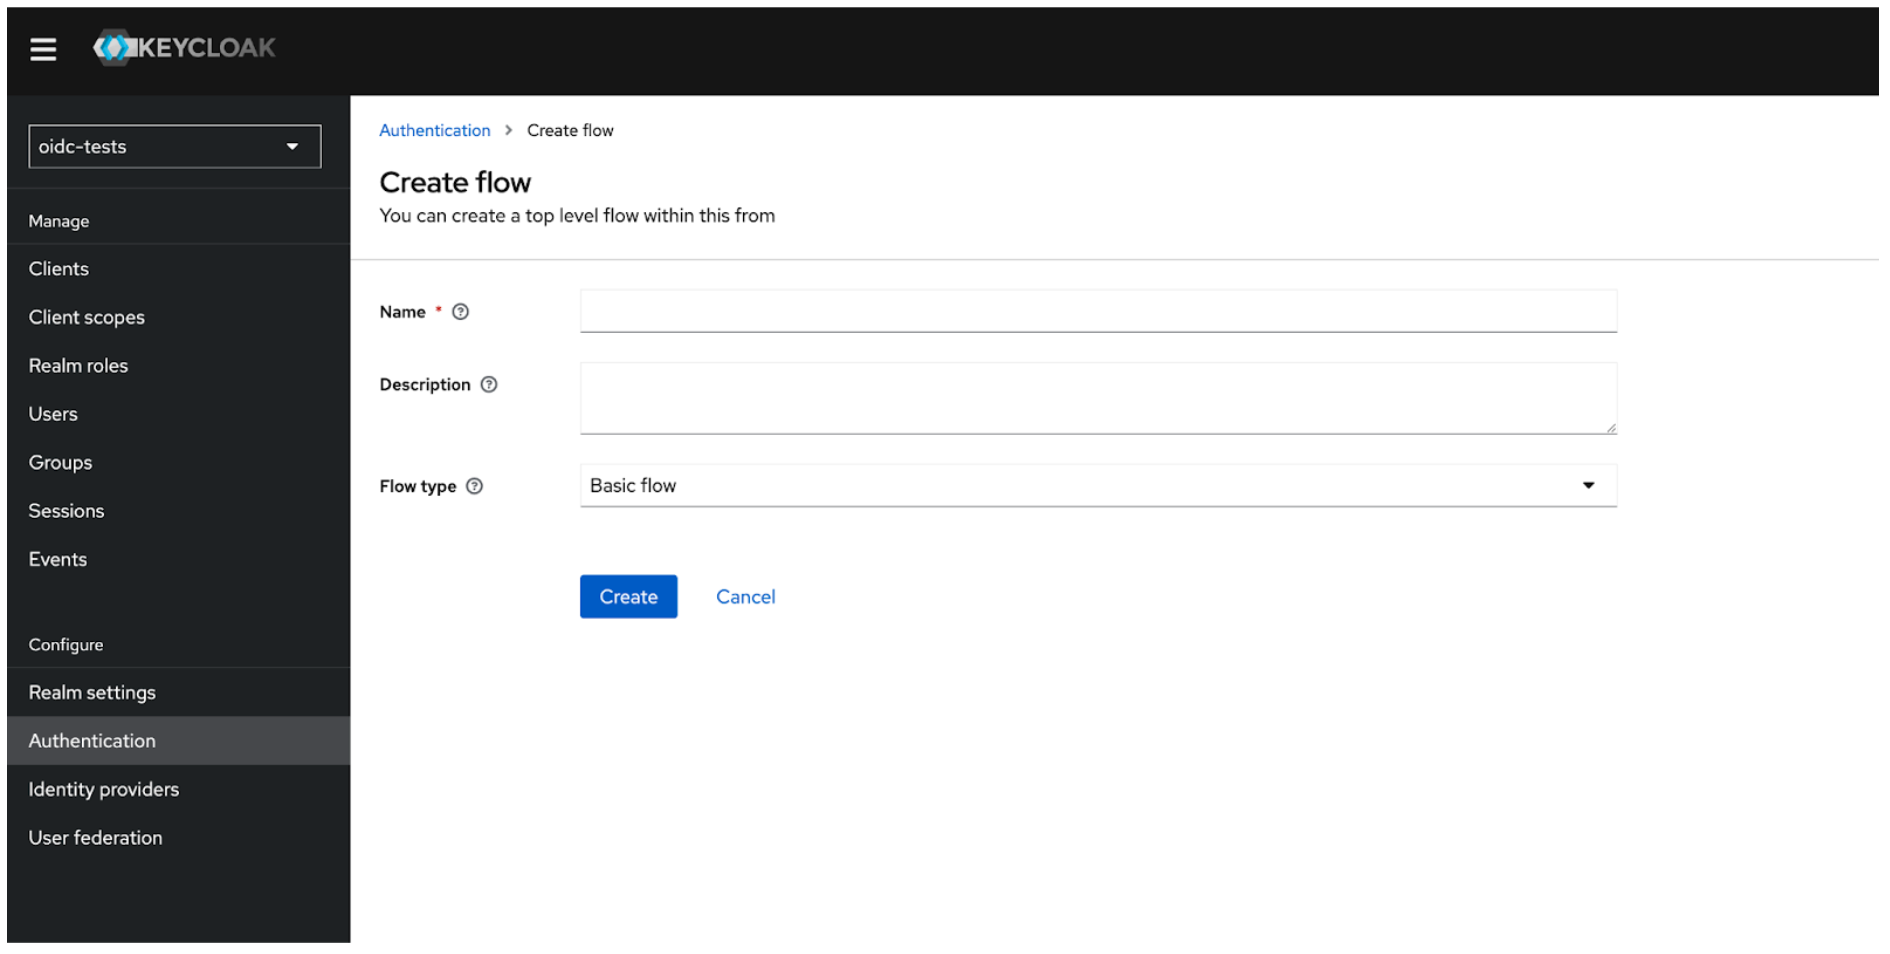 Figure 06: Add Authentication Flow
- Add execution steps required for OpenID Connect-based login.
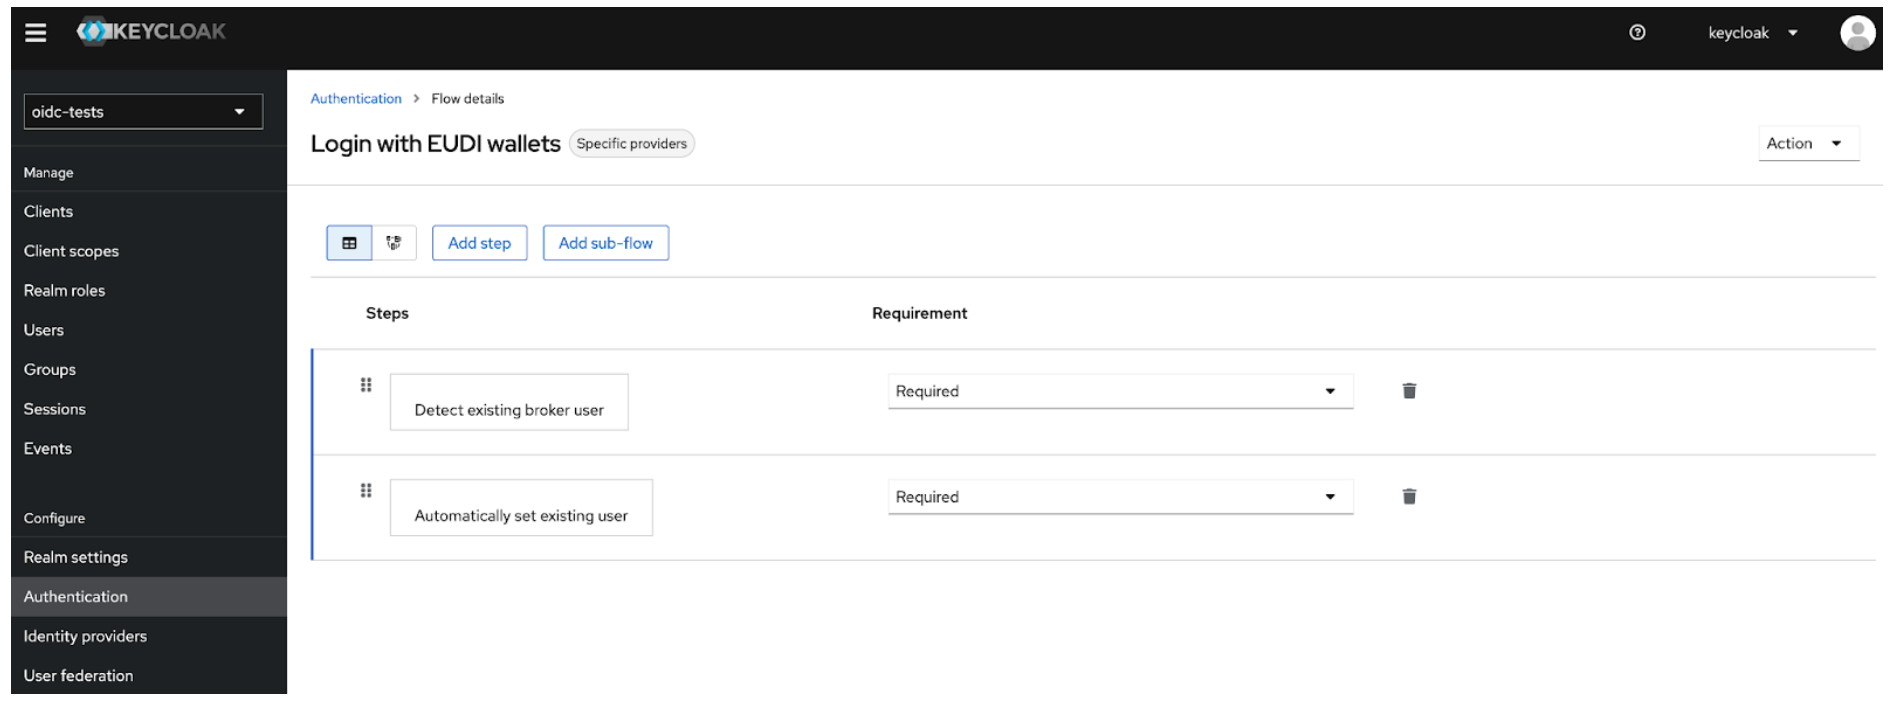 Figure 07: Add Execution Steps
- Mark each step as required to enforce proper validation.
- Save the flow.
Alternatively, add these steps to your current login flow.
Explanation:
- Detect existing broker user: On login from an external IdP, the authenticator checks for a local Keycloak account that matches the external identity (in our case we matched the local username and the email claim). Only users who already exist can continue.
- Automatically set existing user: If a matching local user is found, the authenticator "injects" the user into the authentication context and completes the login (no further confirmation, e.g. password re-entry or email-link is requested).
Step 7: Update the Authentication Flow and Sync Mode in Keycloak
- Navigate to your Identity Provider settings in Keycloak.
- Set the newly created (or updated) authentication flow for the identity provider (e.g. "Login with EUDI Wallet").
- Configure the sync mode ("force" is recommended as it will re-apply the mappers on every login).
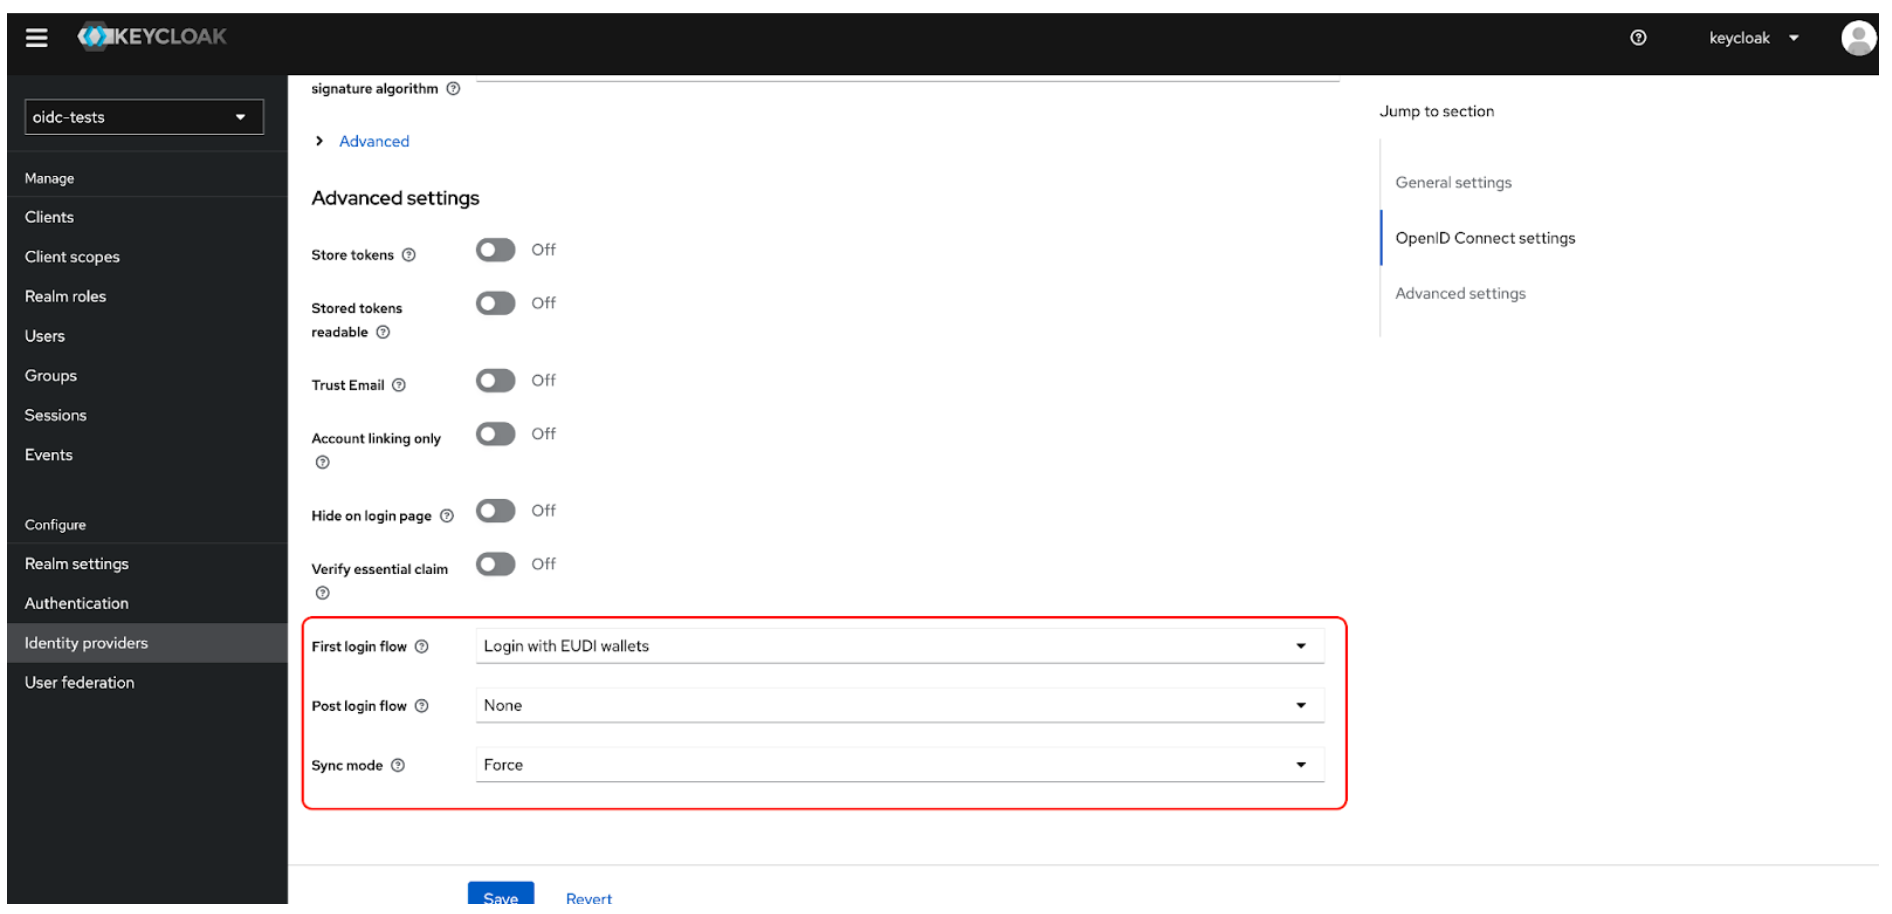 Figure 08: Update the Authentication Flow and Sync Mode in Keycloak
Sample Implementation with React (Keycloak)
A GitHub repository is available that demonstrates how to implement a custom "Sign in with EUDI Wallet" button in a React application integrated with Keycloak IAM:
- Repository: https://github.com/L3-iGrant/passwordless-login-playground
- Features:
- Complete React frontend with EUDI Wallet login button
- Integration with Keycloak as the identity provider
- Step-by-step setup instructions
Auth0 Configuration
Follow these steps to configure Auth0 as a relying party.
Step 4: Create an Application in Auth0
- Log in to your Auth0 dashboard and navigate to Applications > Applications.
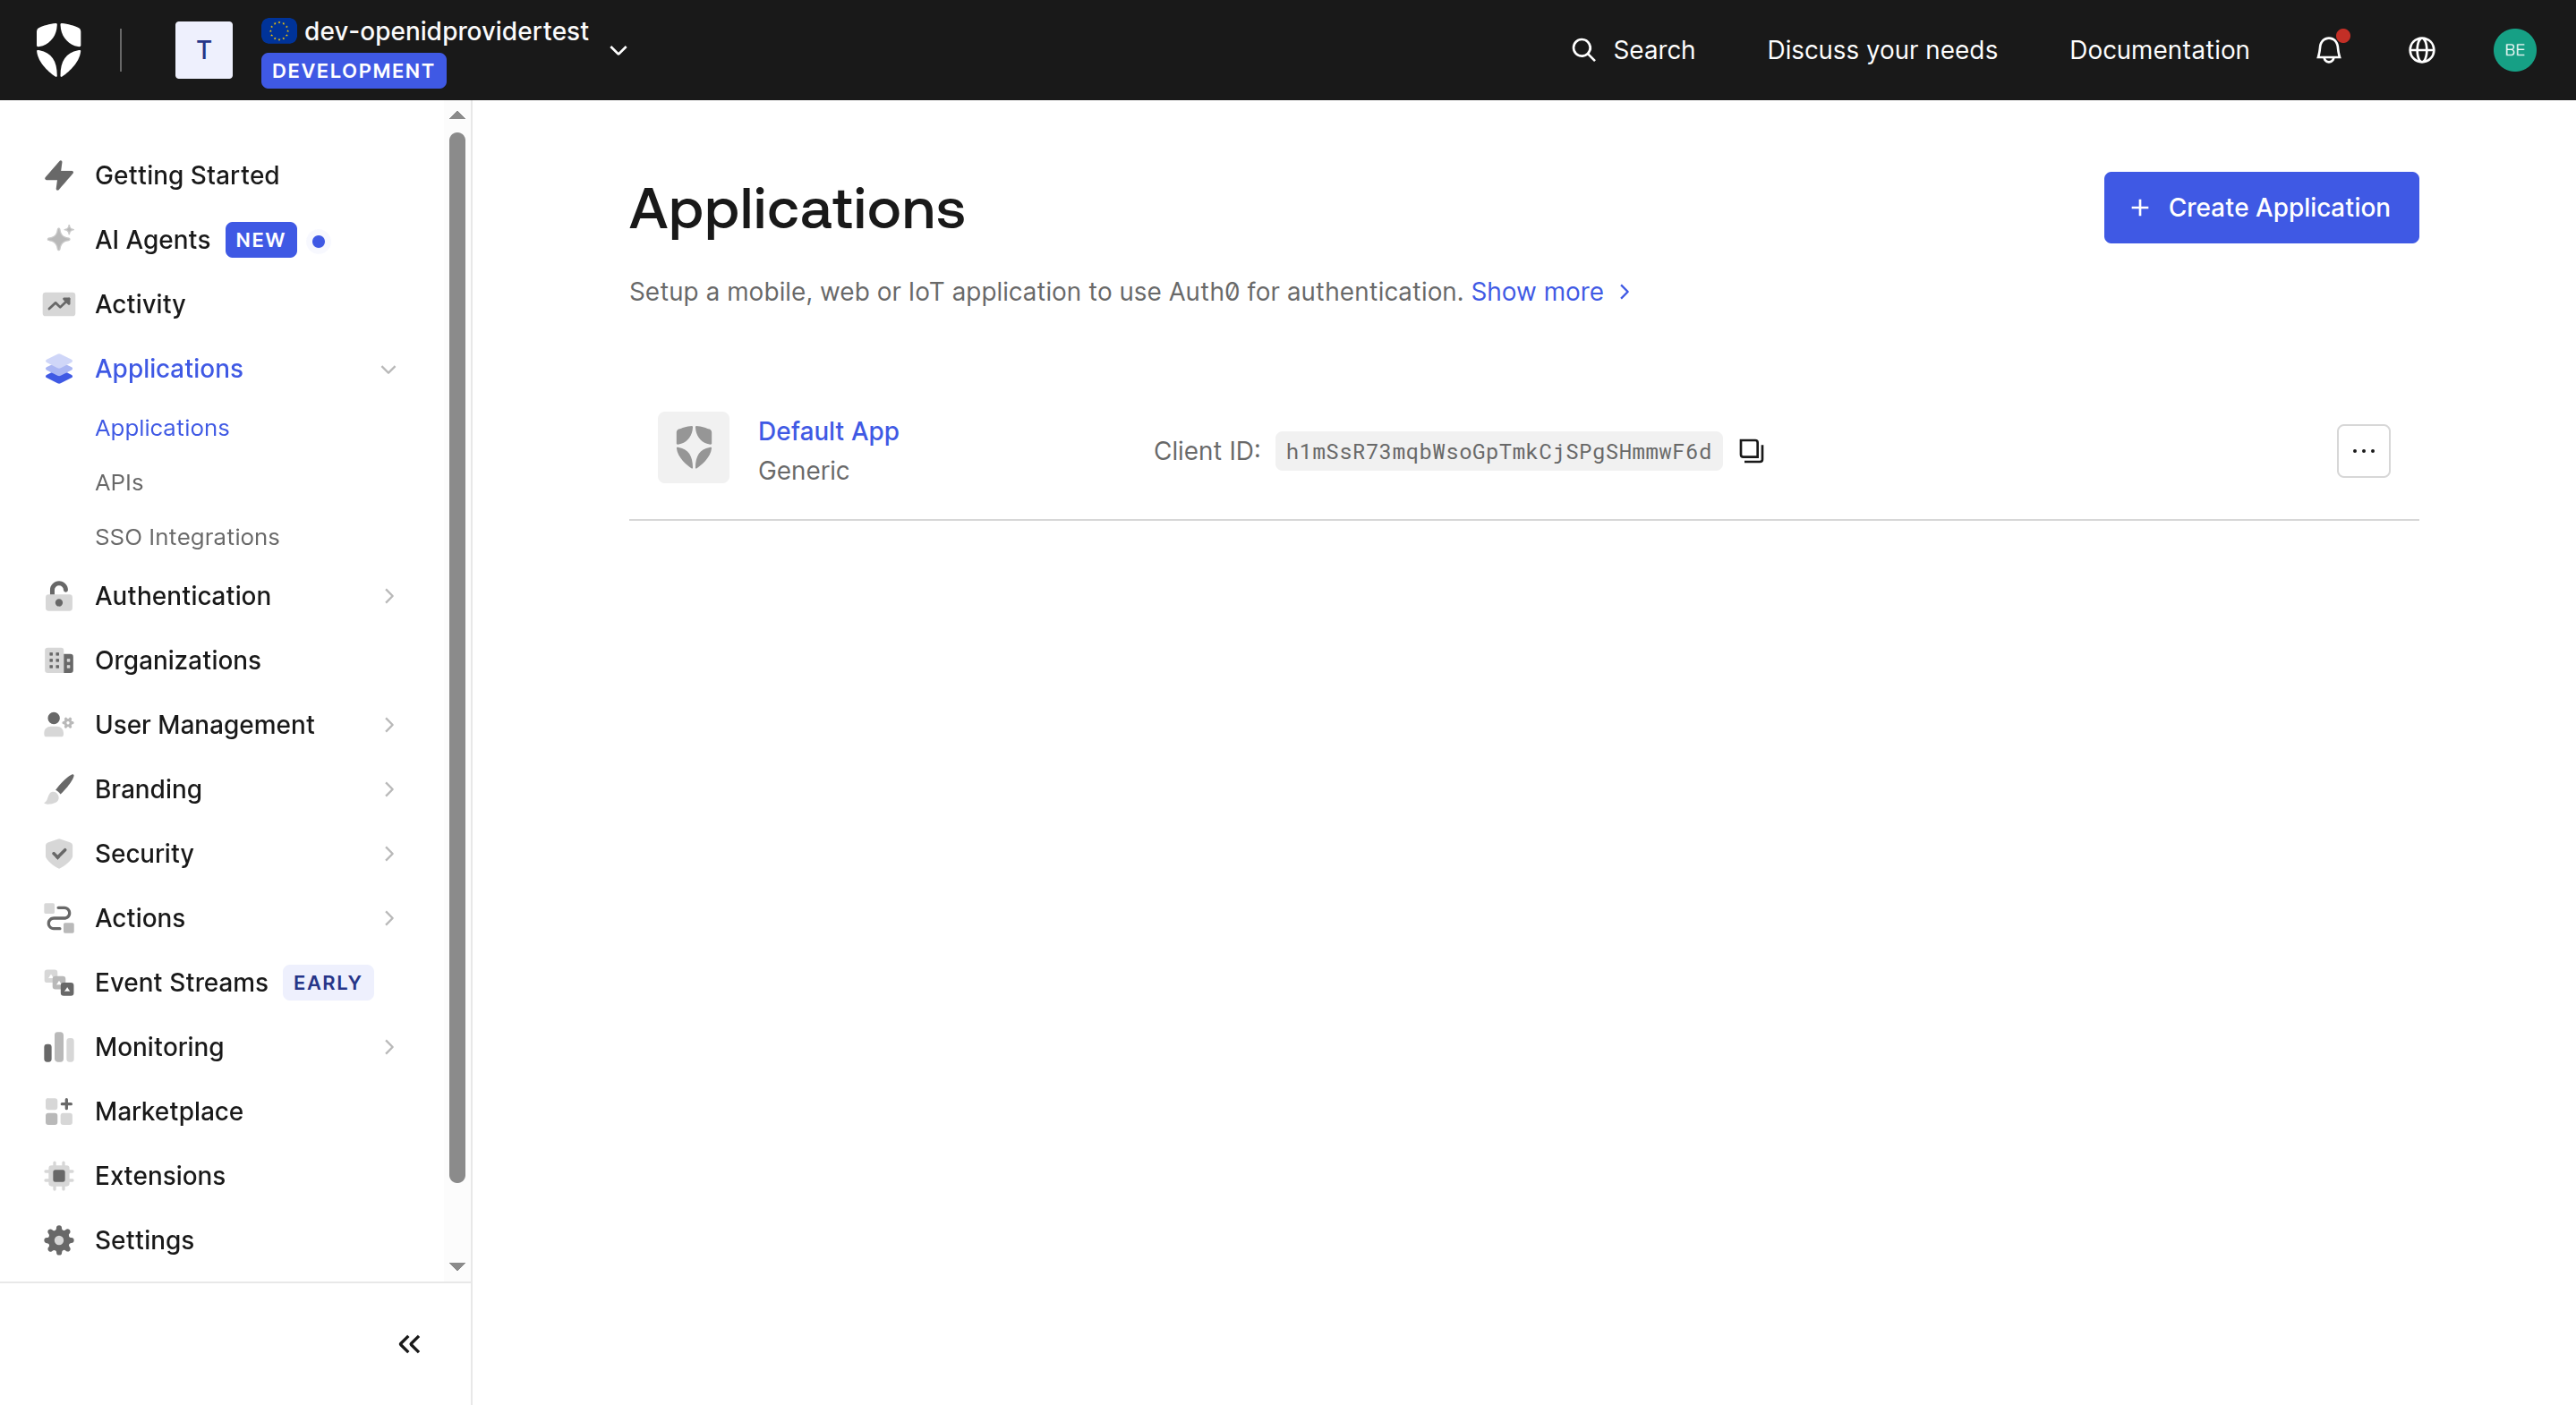 Figure 09: Applications list
- Click + Create Application, give your application a name (e.g.
Auth0 App), and select the appropriate type (e.g. Single Page Web Application for React apps). Click Create.
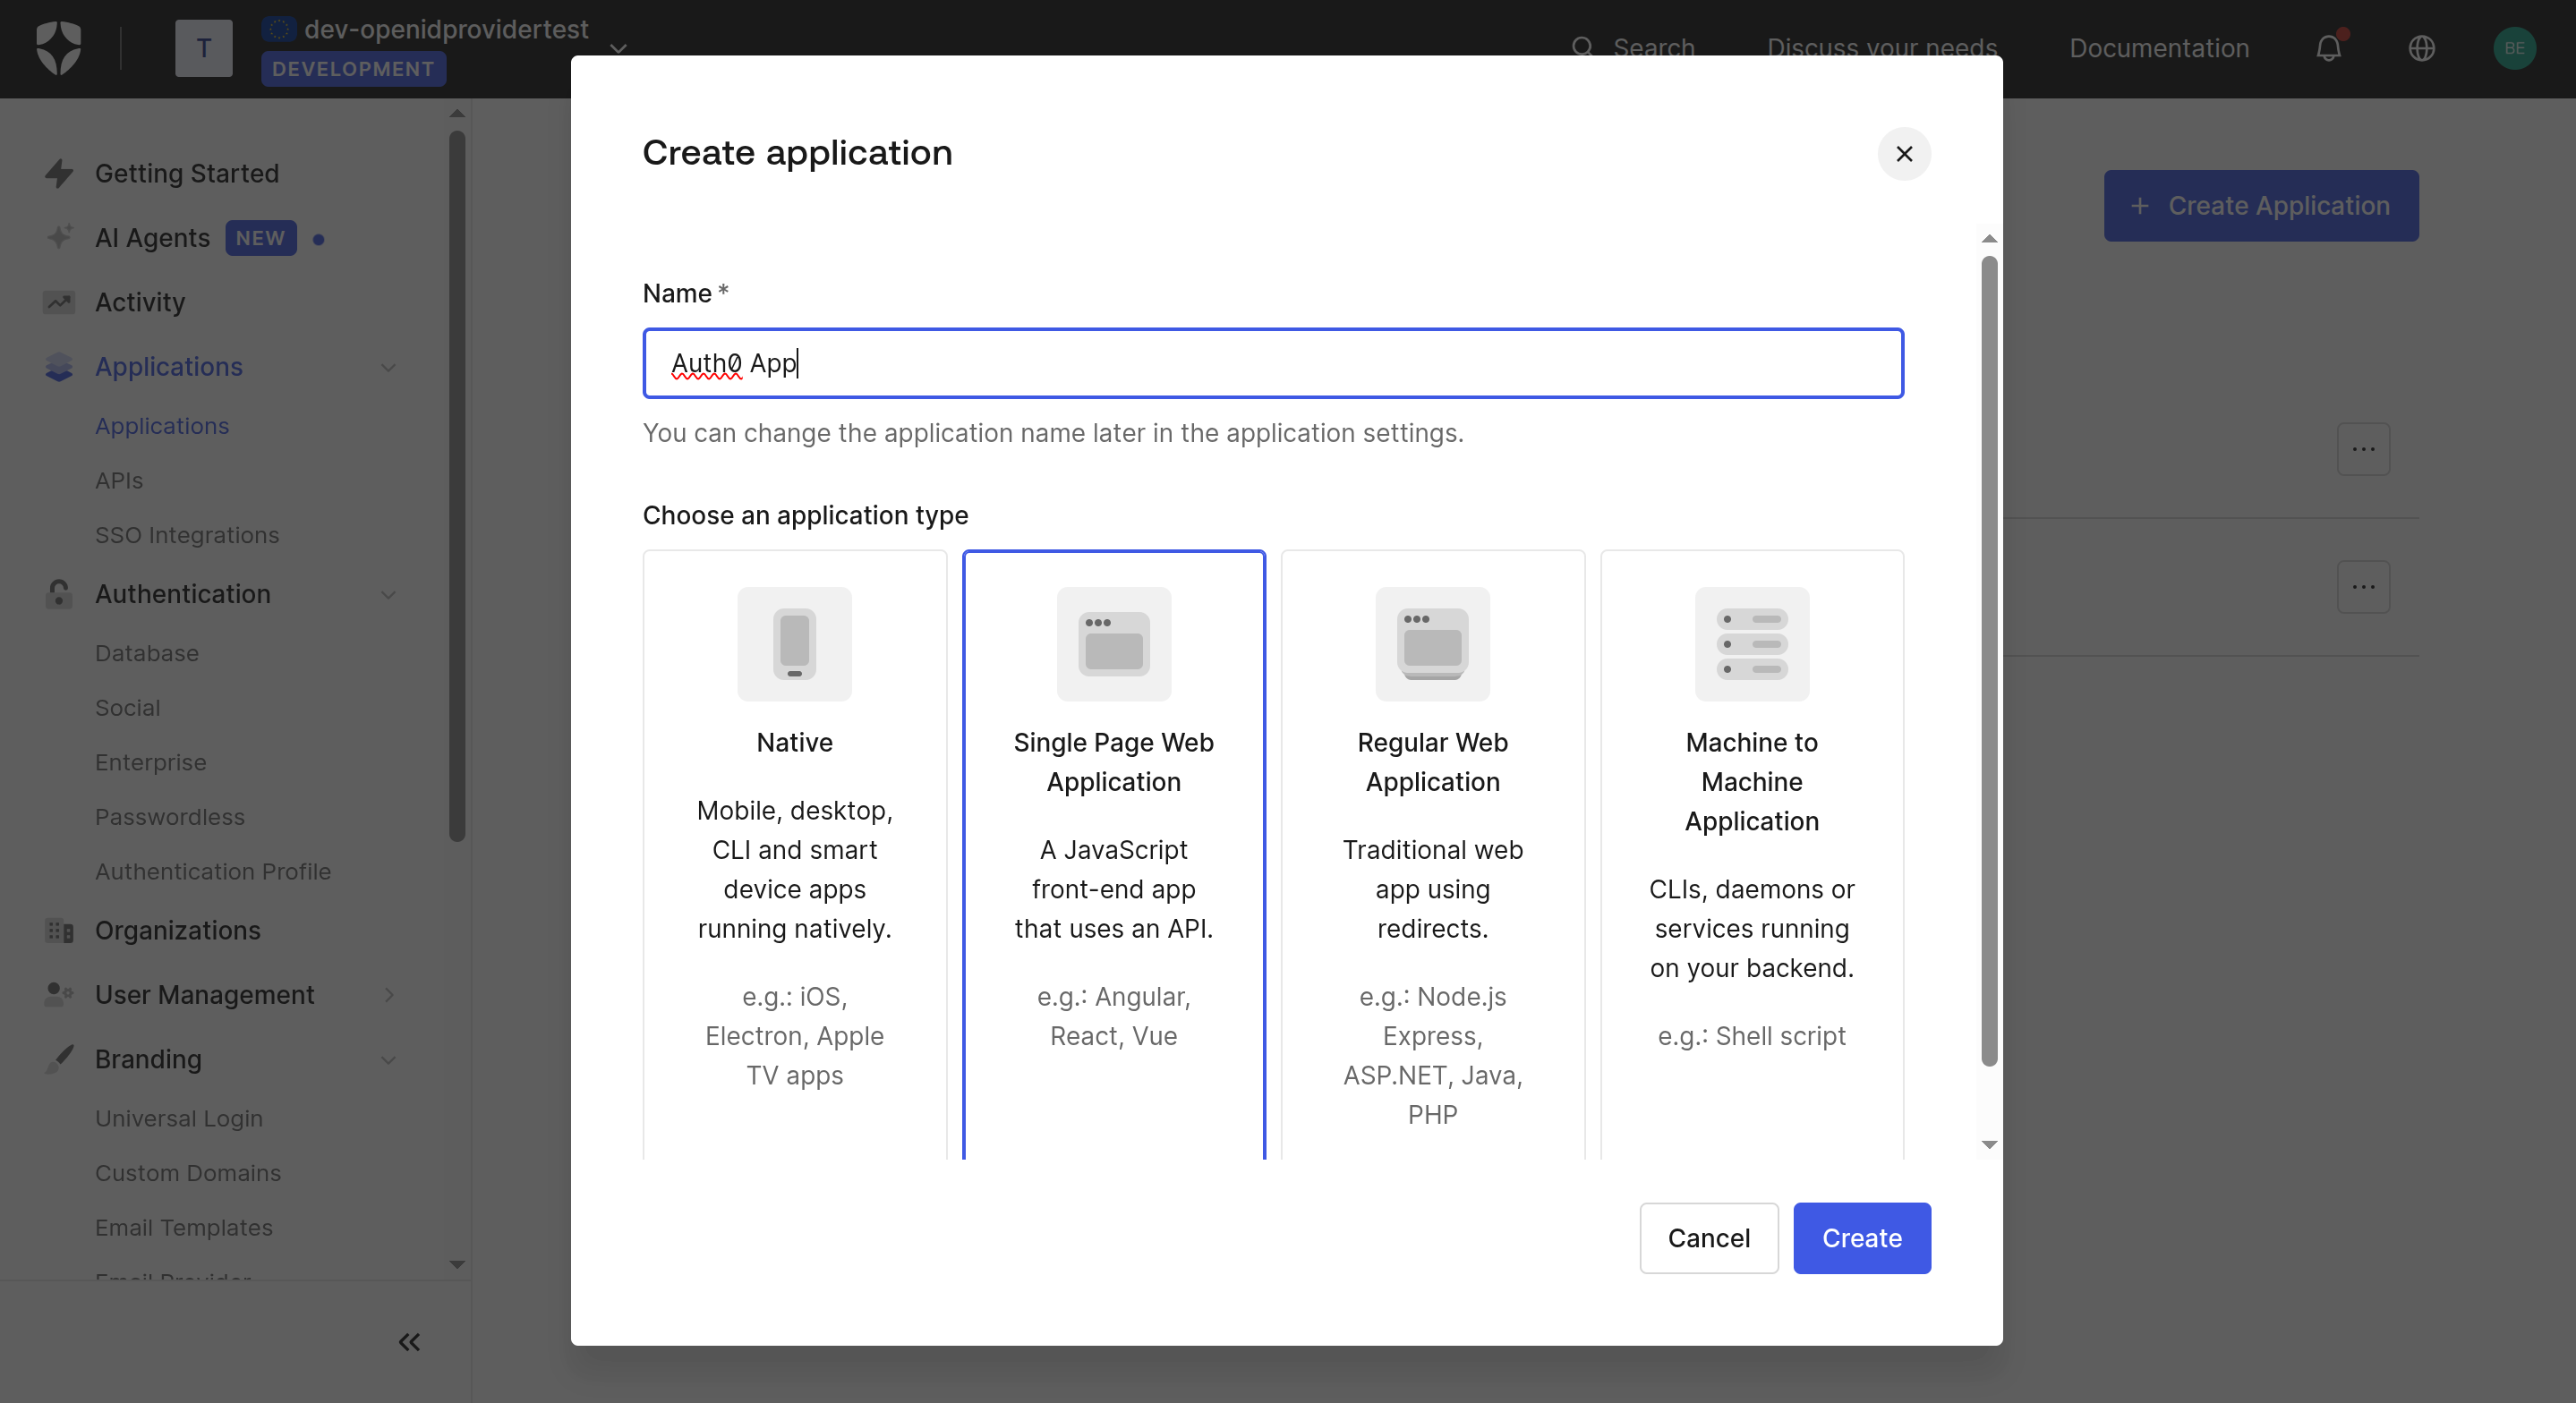 Figure 10: Create Application
- In the application Settings tab, note the Client ID and Domain. Scroll down to Application URIs and fill in:
- Allowed Callback URLs: Your application's post-login redirect URL (e.g.
http://localhost:18080/dashboard) - Allowed Logout URLs: Your application's logout URL
- Allowed Callback URLs: Your application's post-login redirect URL (e.g.
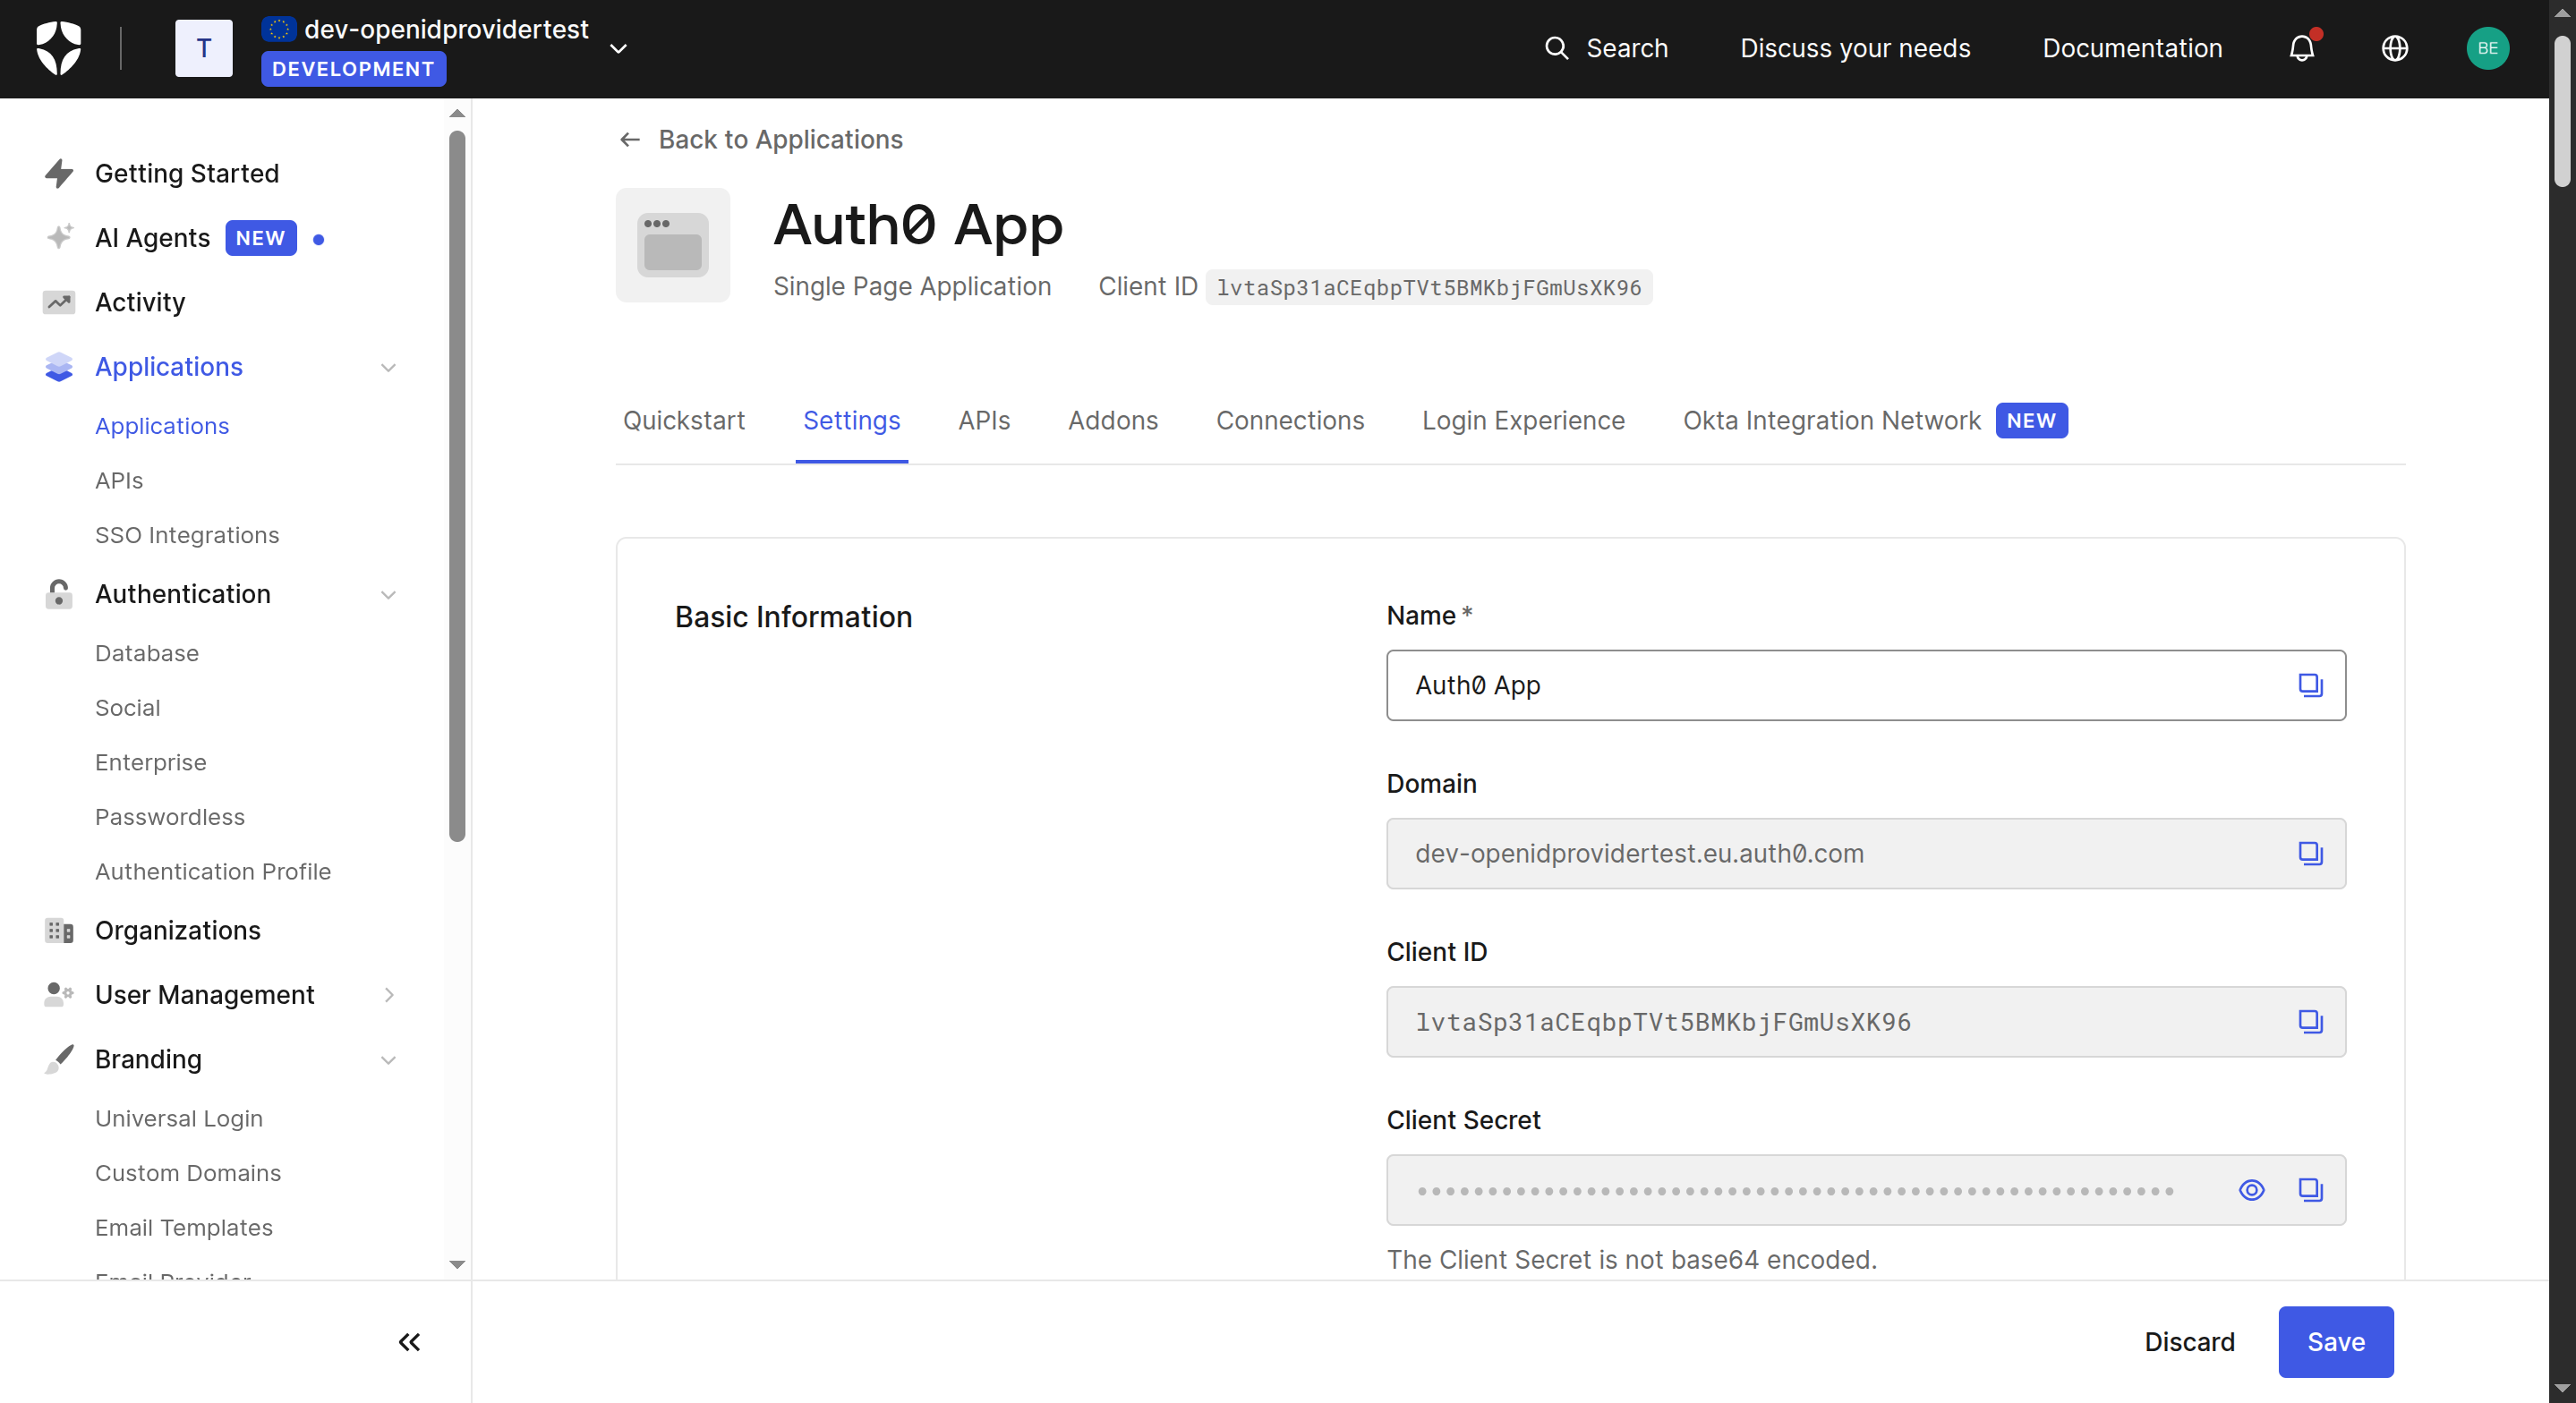 Figure 11: Application Basic Information
 Figure 12: Application URIs
- Under Advanced Settings > Grant Types, ensure Authorization Code is enabled.
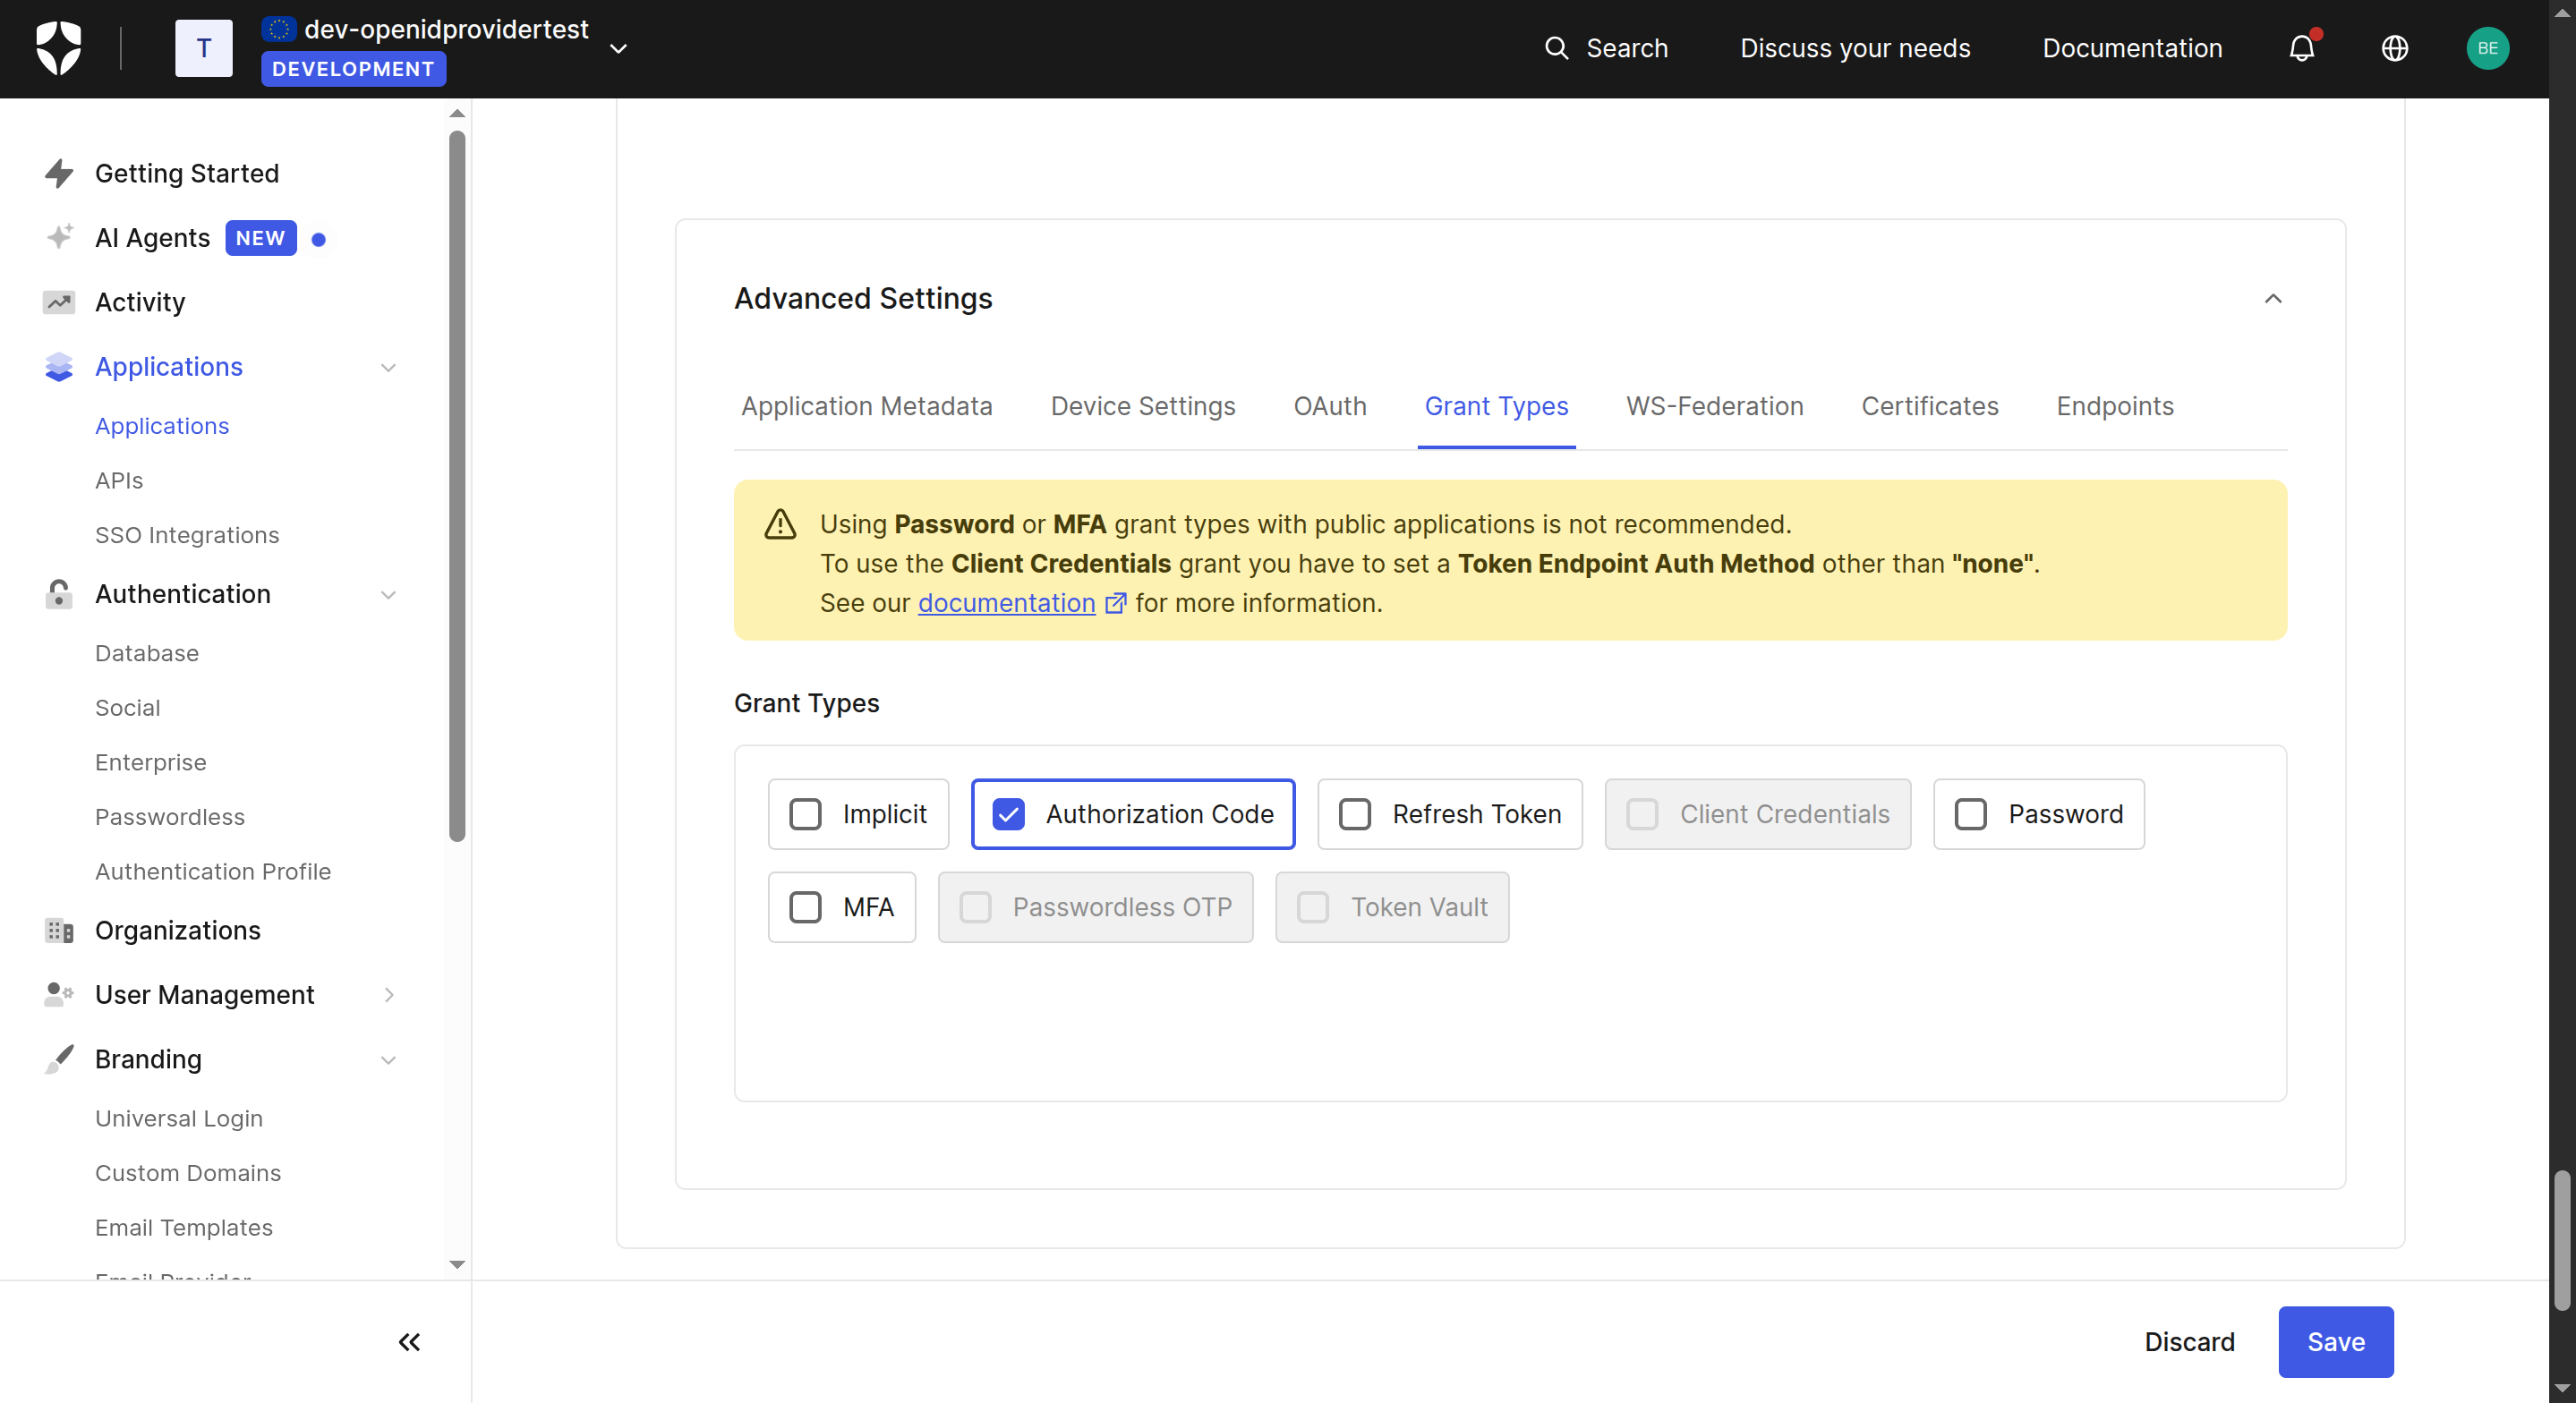 Figure 13: Grant Types
Step 5: Create a Custom Social Connection
Auth0 connects to iGrant.io as a Custom Social Connection using the OIDC endpoints from Step 2.
- Navigate to Authentication > Social and click + Create Connection.
- Scroll to the bottom and select Create Custom.
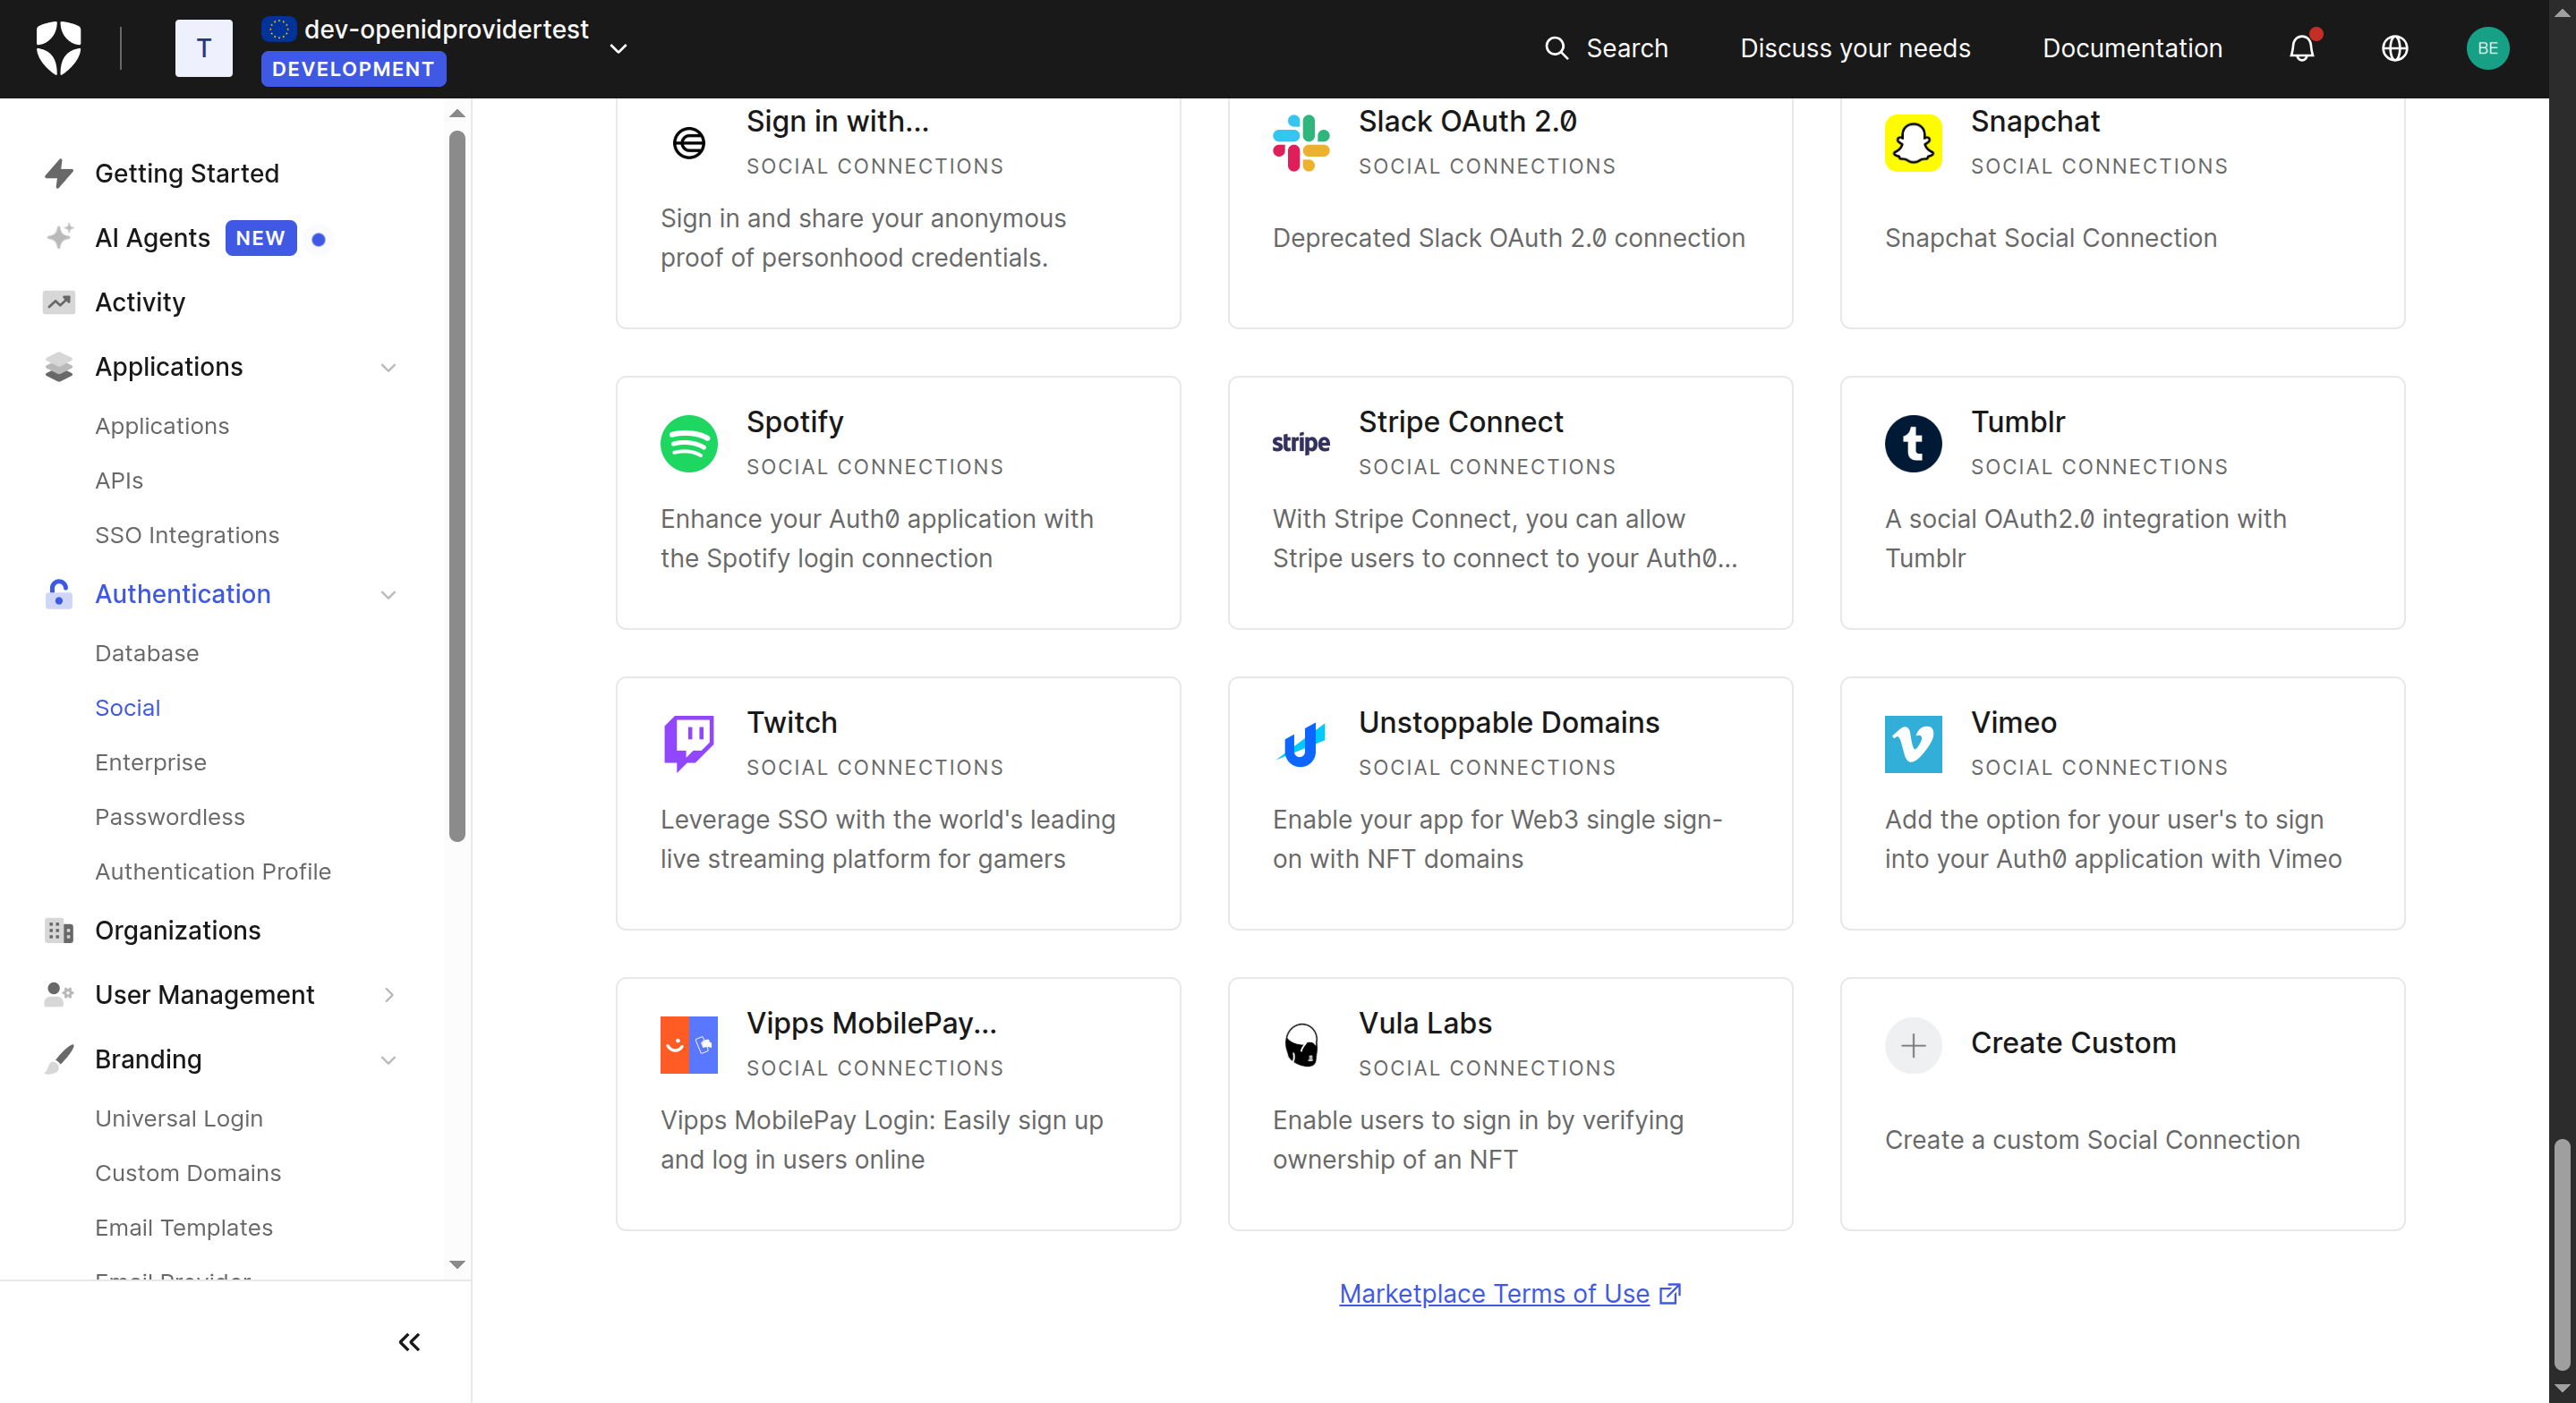 Figure 14: Social Connections – Create Custom
- Set the Purpose to Authentication and click Next.
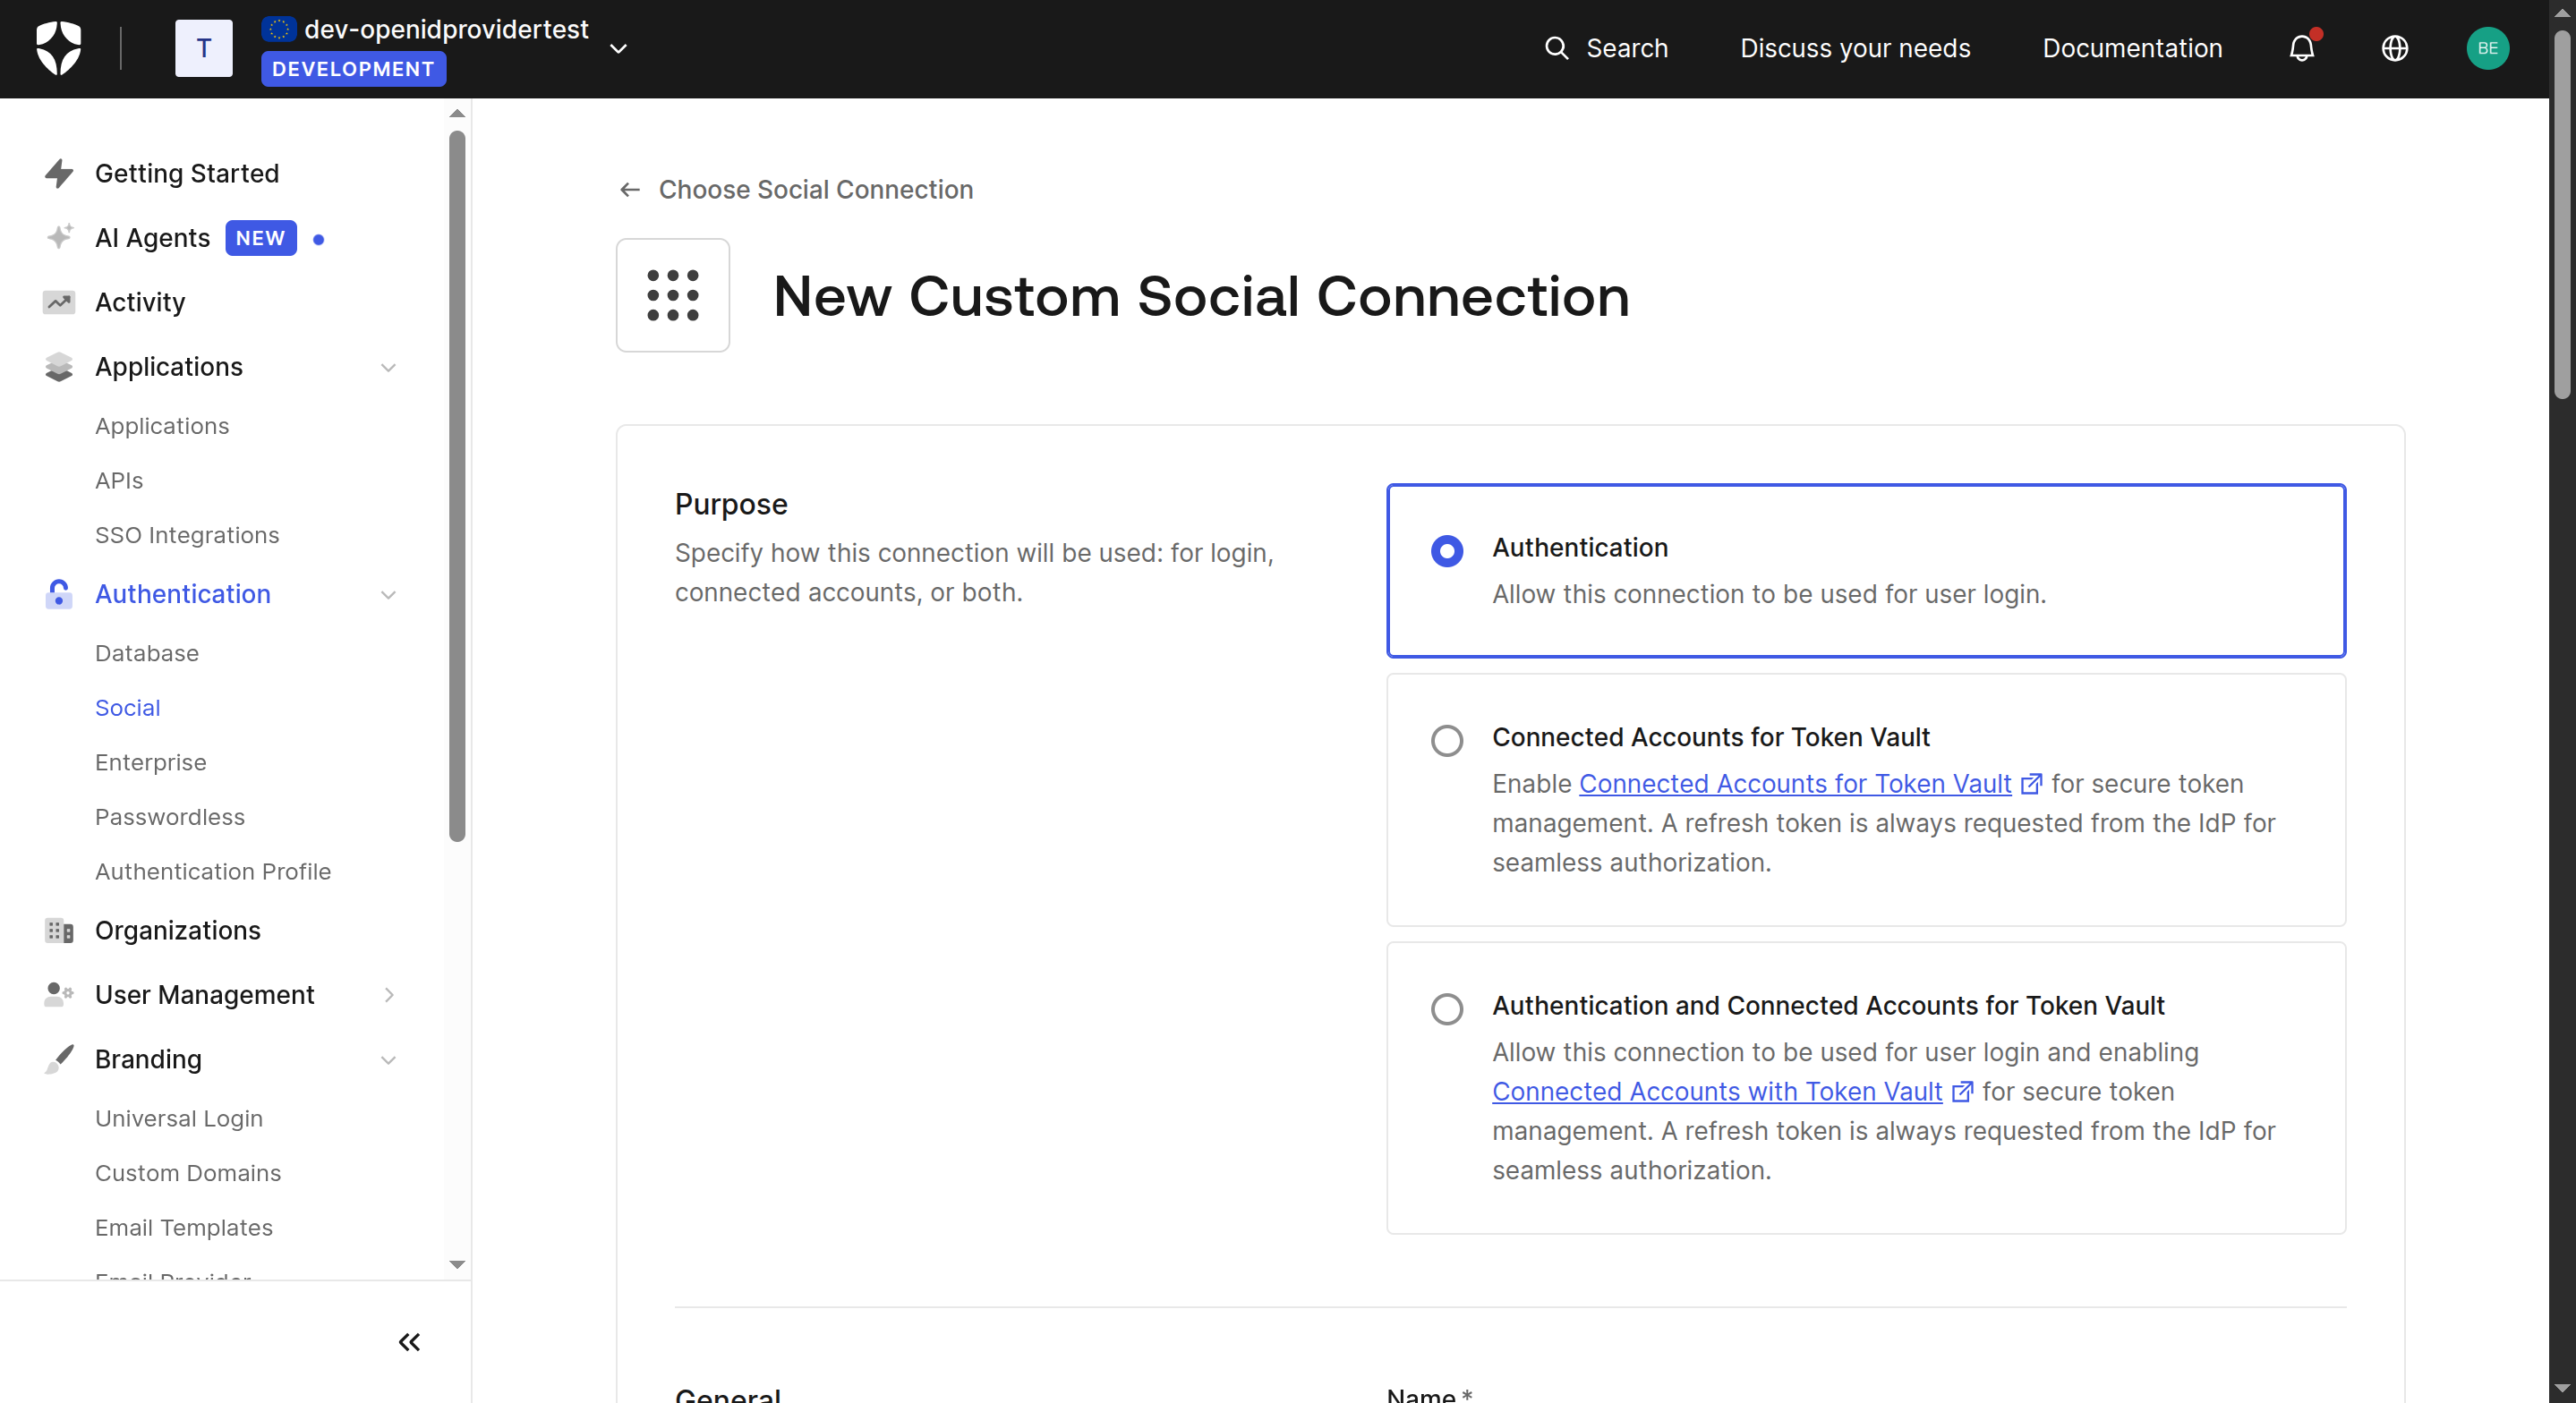 Figure 15: New Custom Social Connection – Purpose
- Fill in the connection details using the values from Steps 2 and 3:
- Name: e.g.
Passwordless-Login - Authorization URL: The authorisation endpoint from the iGrant.io OIDC discovery document
- Token URL: The token endpoint from the iGrant.io OIDC discovery document
- Scope:
openid - Client ID: (from step 3)
- Client Secret: (from step 3)
- Name: e.g.
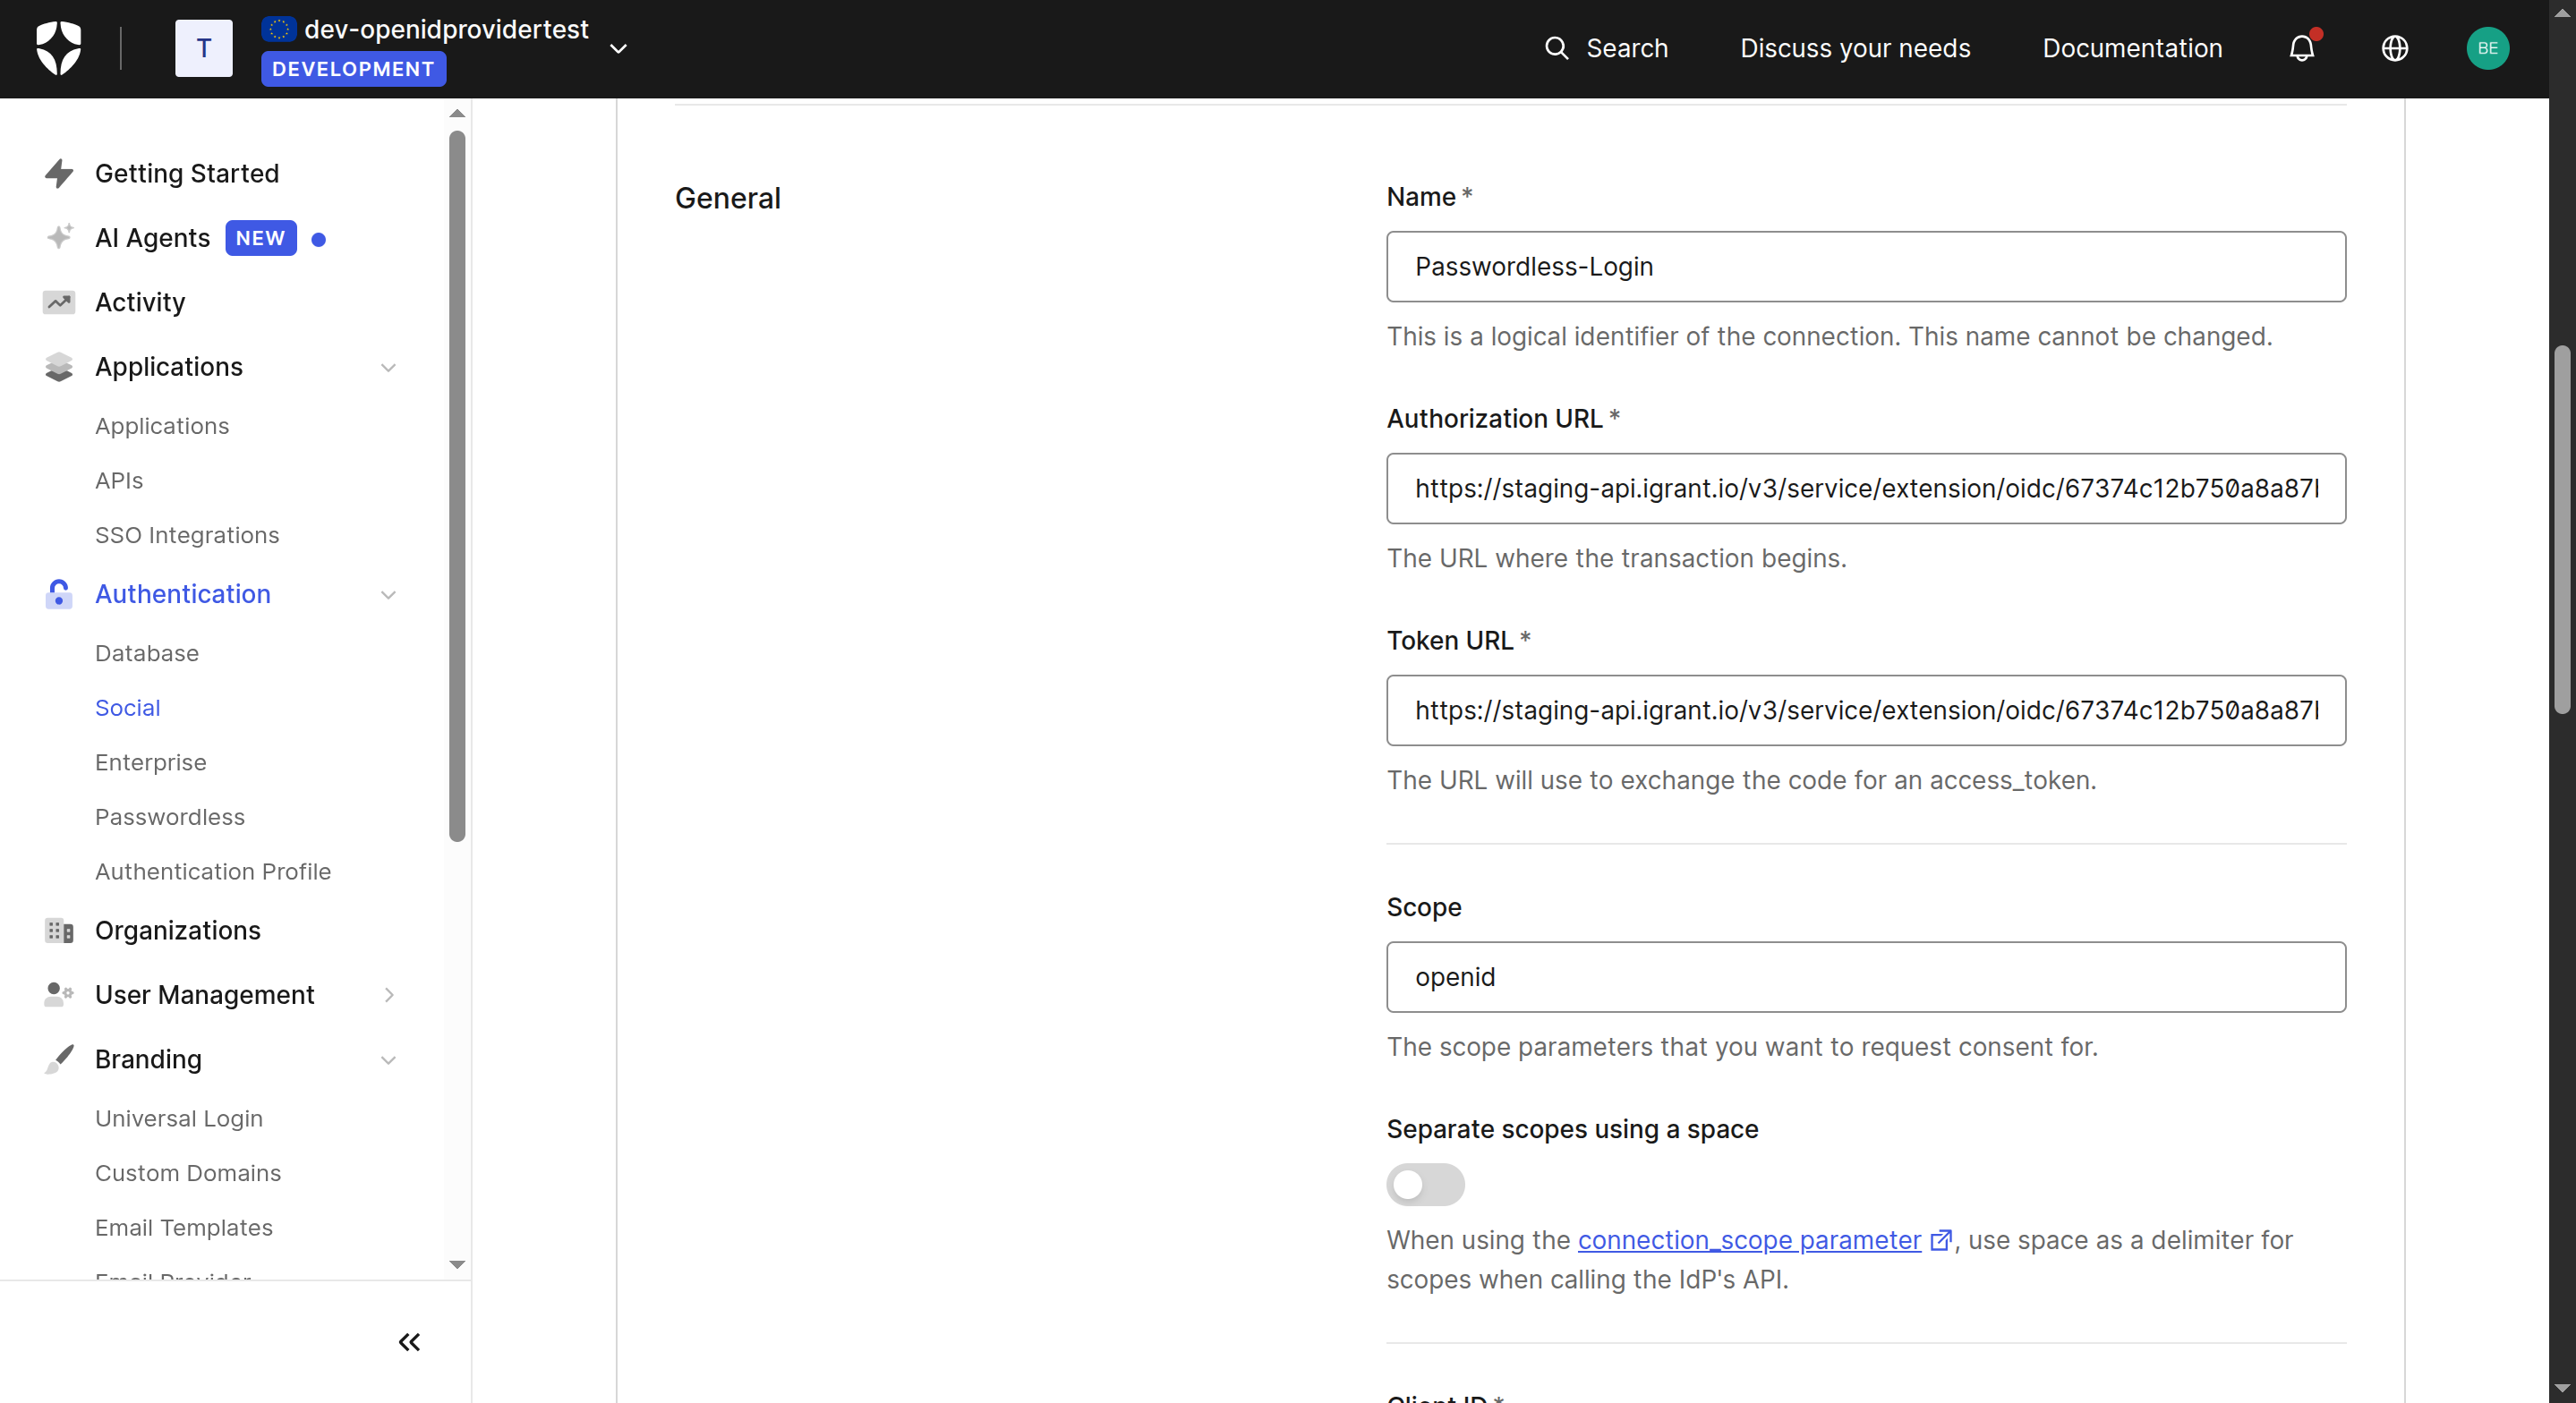 Figure 16: Connection configuration – Authorization & Token URLs
- In the Fetch User Profile Script field, enter a script that calls the iGrant.io UserInfo endpoint to retrieve the user's profile. Replace the URL with your organisation's UserInfo endpoint (found in the OIDC discovery document from Step 2). The following snippet also maps the user profile to Auth0's format:
The Authorisation header must be added with a base64-encoded Client ID and Client Secret (formatted as client_id:client_secret).
function(accessToken, ctx, cb) {
    const request = require('request');
    const options = {
        url: 'https://<your-org-api>/v3/service/extension/oidc/<organisationId>/<clientId>/userinfo',
        headers: {
            Authorization: `Bearer ${accessToken}`
        },
        json: true
    };

    request.get(options, (err, response, body) => {
        if (err || response.statusCode !== 200) {
            return cb(new Error('Failed to fetch user profile'));
        }

        // Map the user profile to Auth0's format
        const profile = {
            user_id: body.sub, // Unique identifier from your IdP
            username: body.presentation["0"].email,
            nickname: body.presentation["0"].given_name,
            name: body.presentation["0"].given_name + " " + body.presentation["0"].family_name,
            email: body.presentation["0"].email,
        };

        cb(null, profile);
    });
}
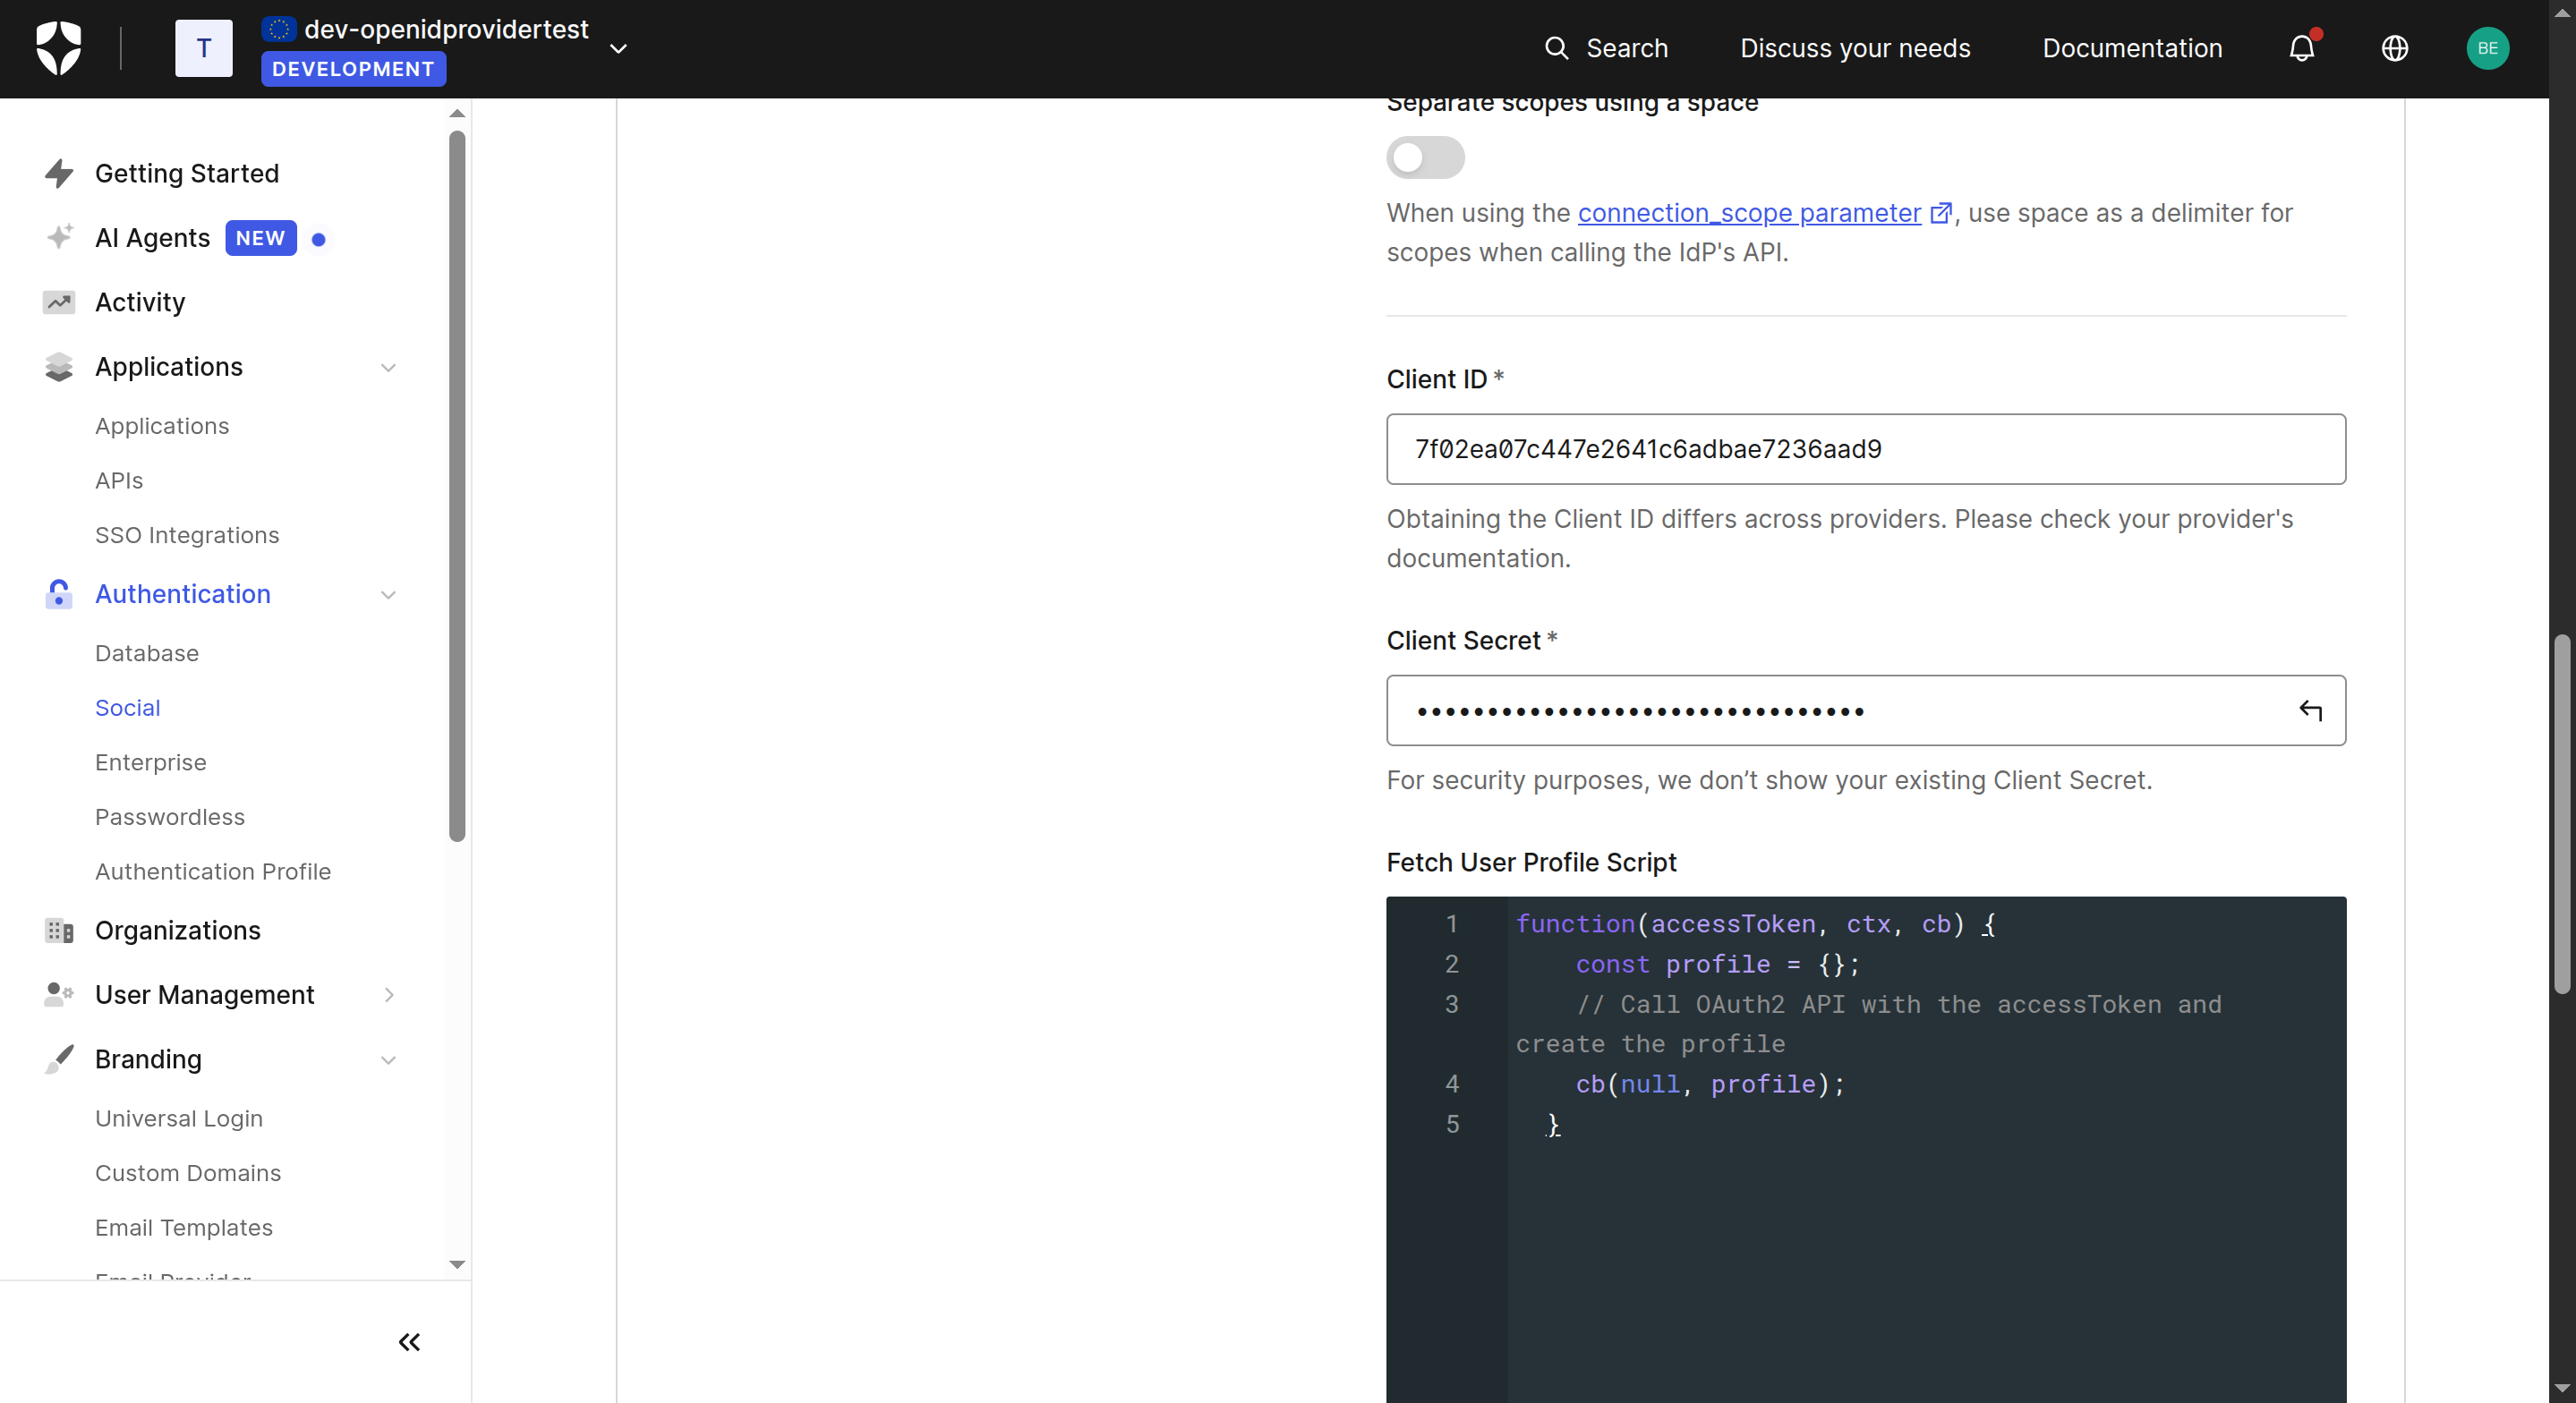 Figure 17: Fetch User Profile Script and Client credentials
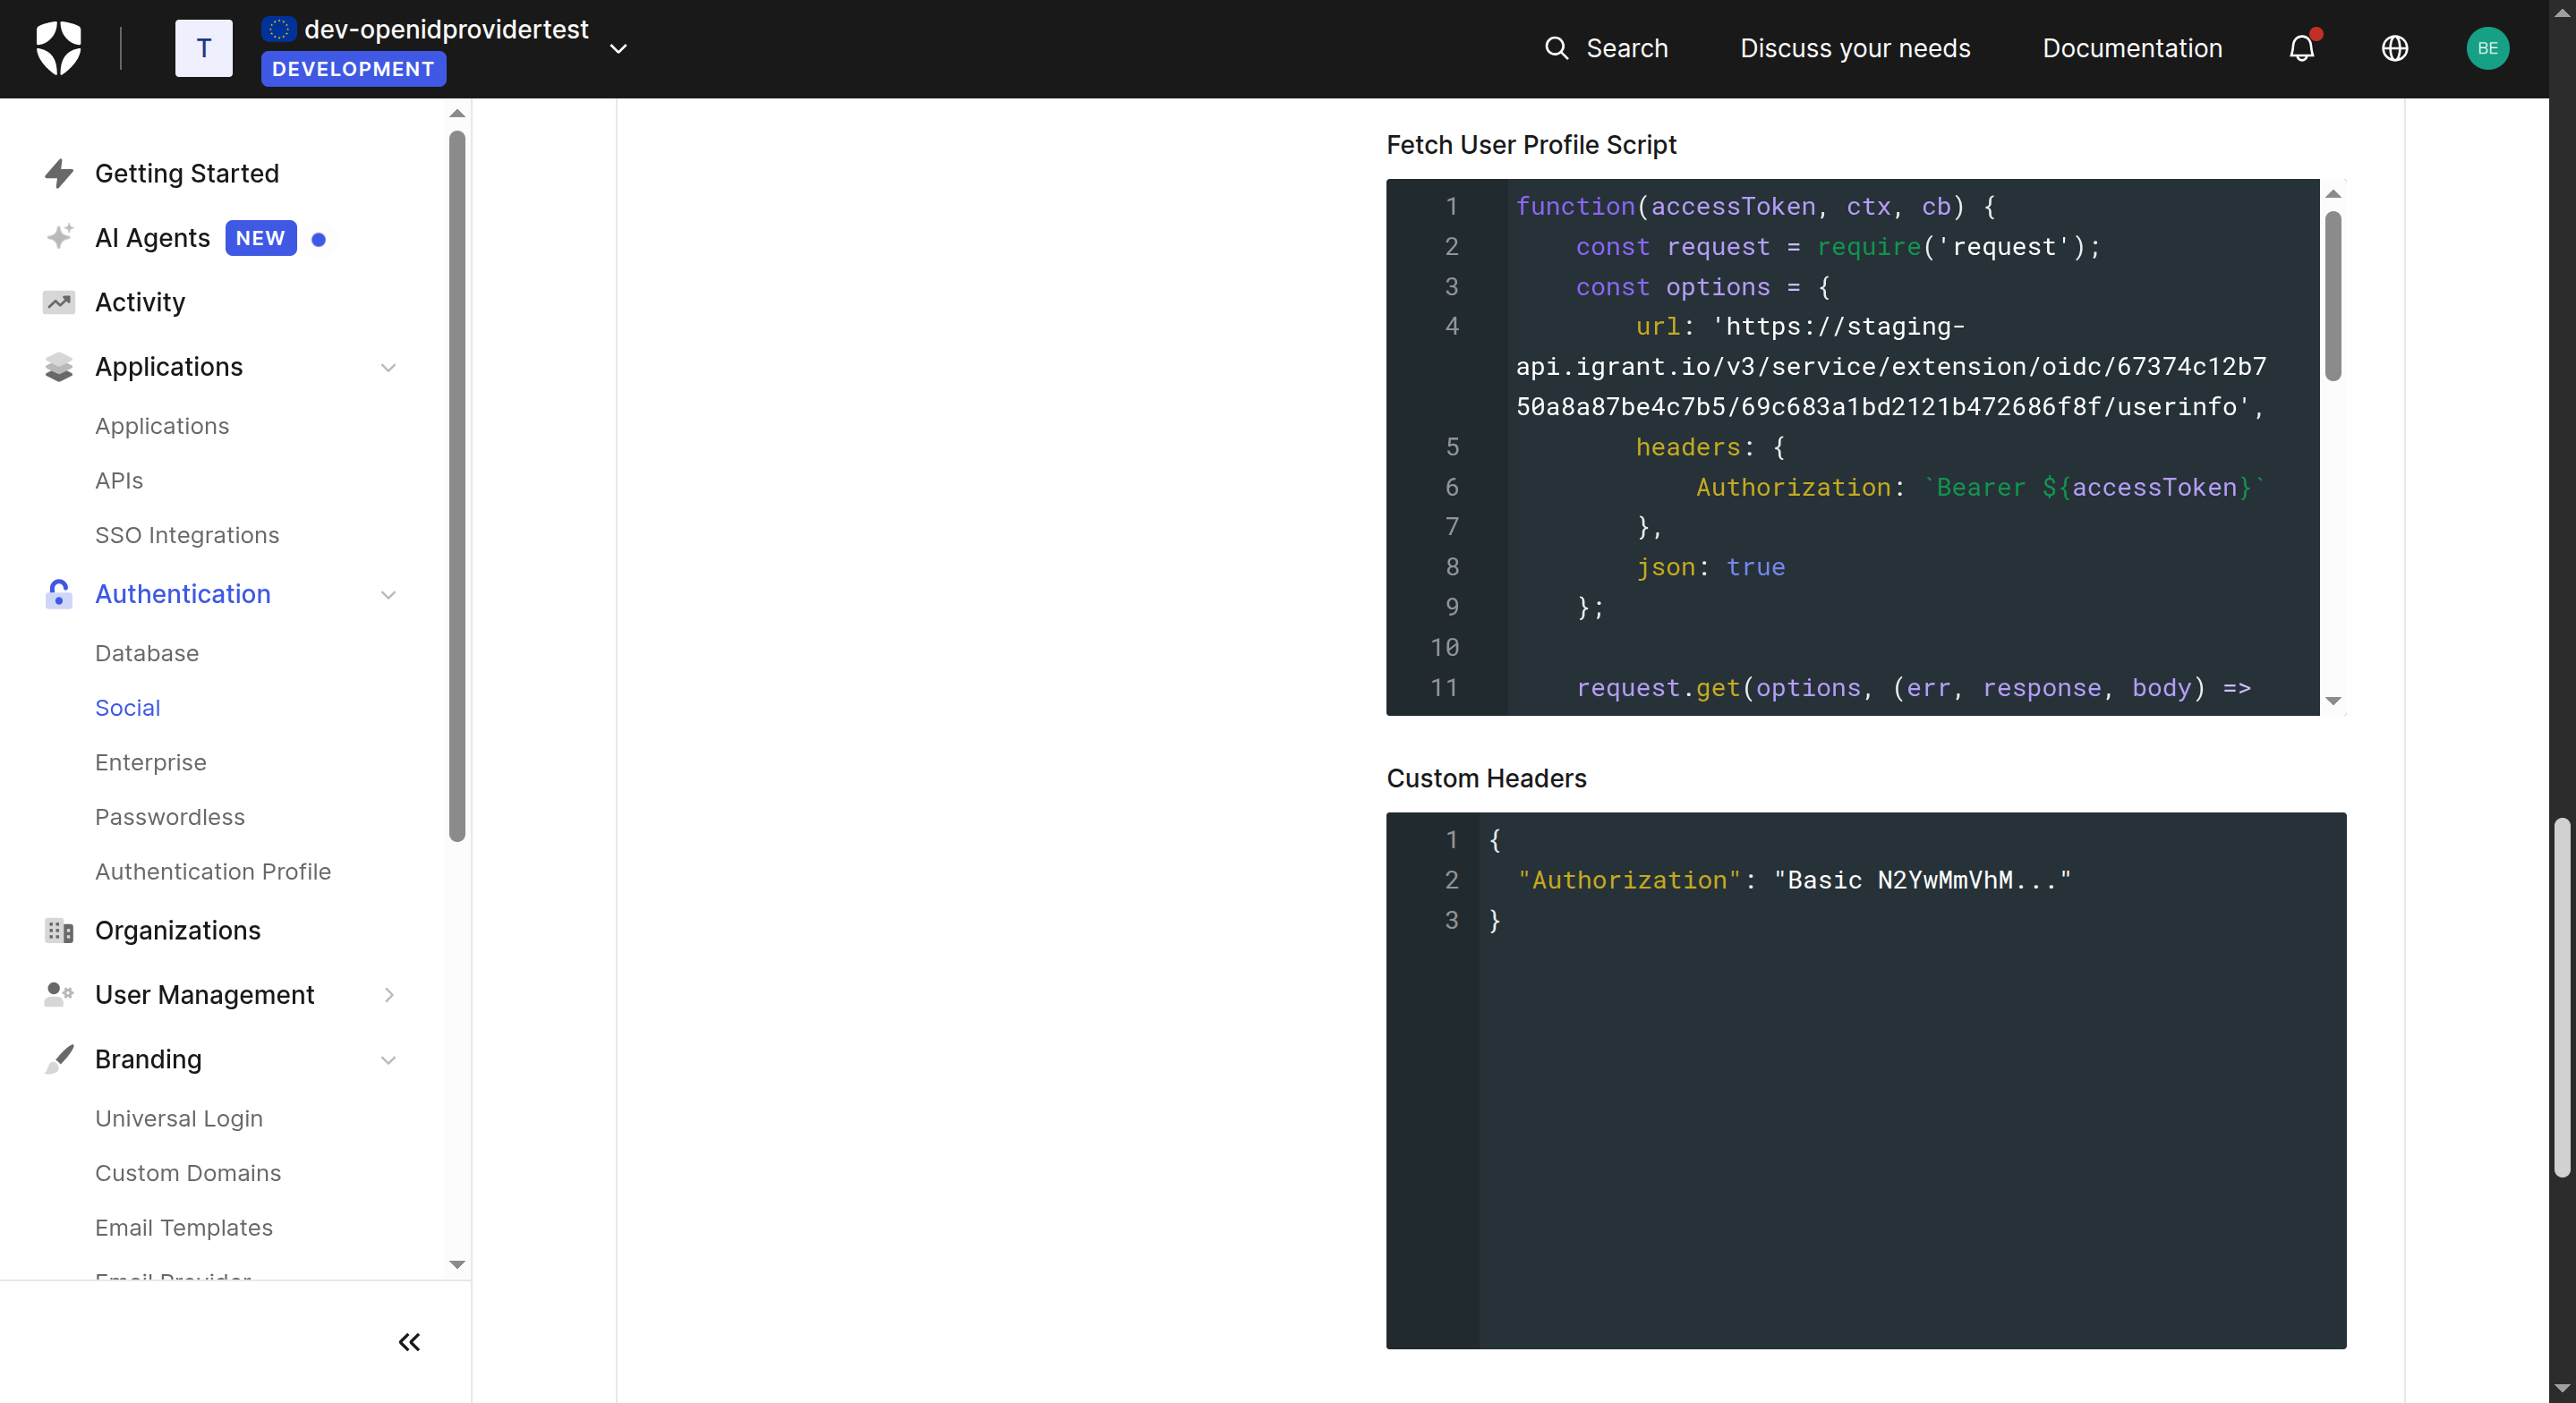 Figure 18: Full Fetch User Profile Script
- Click Create to save the connection.
Step 6: Enable the Connection for Your Application
- Navigate back to your application (Applications > Applications > your app).
- Go to the Connections tab.
- Enable the Passwordless-Login custom social connection you just created.
 Figure 19: Enable connection for the application
Once enabled, Auth0 will route authentication requests to iGrant.io and use the UserInfo endpoint to populate the user's profile in Auth0.
Note: You can find the Redirect URI for the iGrant.io client in your Auth0 application's Settings tab. Update the iGrant.io OIDC client here to include it if not already done.
Try It Yourself
A demonstration video will be available soon showing the complete passwordless login flow with EUDI Wallets.