Payment Data Confirmation
This workflow implements European Wallet Consortium (EWC) RFC008, as specified by the EWC Payment Task Force. It uses the OpenID for Verifiable Presentation (OpenID4VP) protocol with "payment transaction data" to confirm payments. The figure below, shows also aspects from EWC RFC007 to fullfill the entire process.
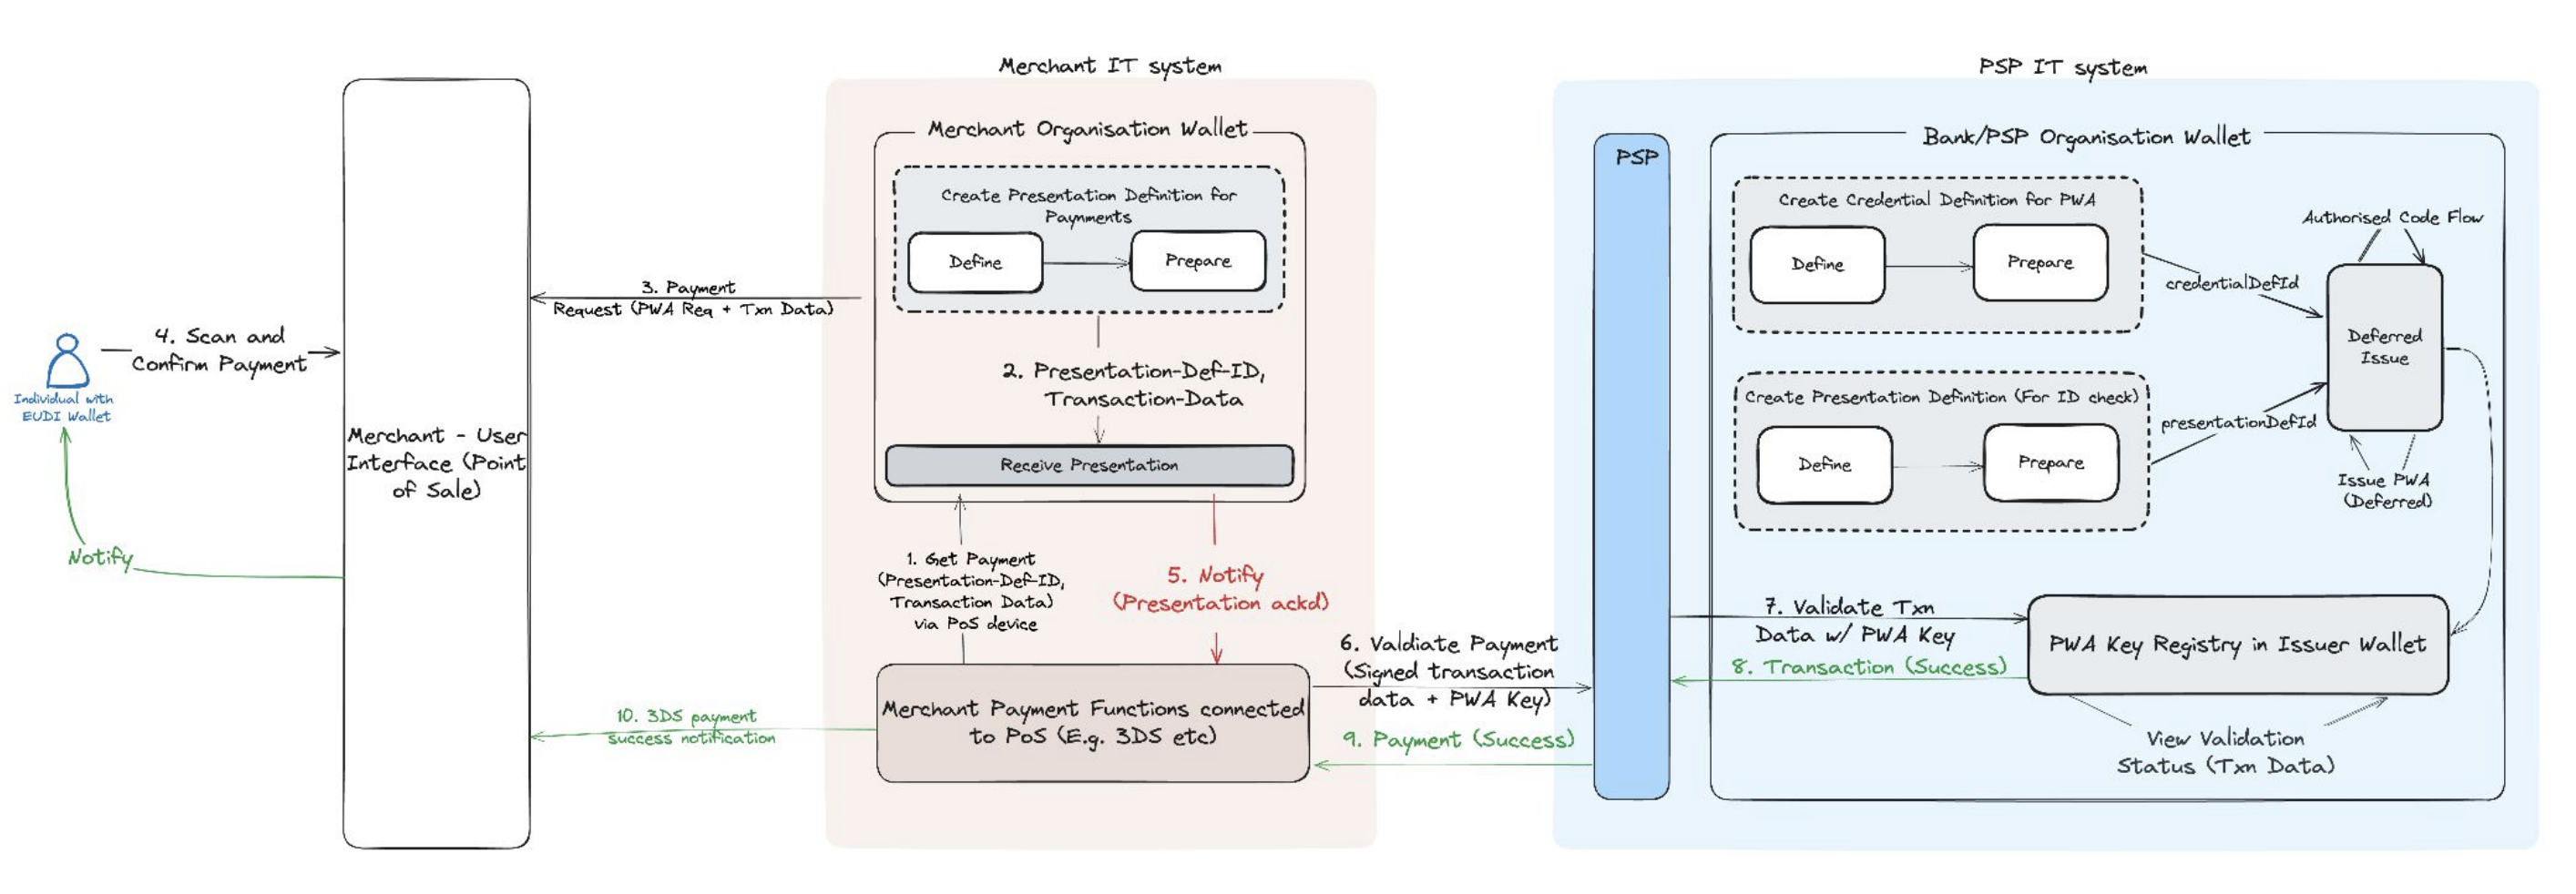
Step 1: Get the API Key (Issuer Admin)
To obtain your API key, please contact [email protected]. Once you have received your API key, enter it in the field below and click the Set API Key button to save it for future use.
Step 2: Create Payment Definition (Merchant Verifier Admin)
In this step, the merchant admin is creating a presentation definition for receiving the payments for transactions. To create a presentation definition for requesting proof, you can run the code block below using the Run button. Alternatively, you can manually copy the code block and use it in the body of the API request provided here.
Request
Response
presentationDefinitionId can be reused to issue multiple credentials (Step 3).Step 3: Send Payment Request (Merchant/Relying Party)
Here, the merchant requests payments from the holder the transaction data while requesting verification of the Payment Authenticator . To create the verification request, execute the code block below using the Run button. Alternatively, you can manually copy the code block and use it in the body of the API request available here.
After receiving the response, toggle the button provided to dynamically generate a QR code. The EUDI Wallet/Holder can then confirm the transaction using the Data Wallet (or any other EU Digital Identity Wallet) by either scanning the QR code or directly accessing the verification request on their mobile device, such as via a browser.
Request
Response
Step 4: Confirm Payment (Holder)
The EUDI Wallet/Holder receives the request to payment (PWA+Transaction) from the merchant. The holder can now confirm the payment using the Data Wallet (or any other EU Digital Identity Wallet) by either scanning the QR code or directly accessing the "Pay" link on their mobile device, such as via a browser.
Step 5: Validate Payment Confirmation (Merchant Verifier/Relying Party)
If a webhook is configured, upon receiving the openid.presentation.presentation_acked.v3 webhook event, the merchant captures the payment confirmation data. It now sends it to the card/psp issuer via 3DS or any existing payment protocols for payment confirmation/validation. You can run the JSON code block below using the Run button using the presentationExchangeId from the previous step.
Path Parameter
Response
Step 6: Validate Transaction Data (PSP/Bank Issuer)
In this step, the PSP/Bank validates the transaction data against the Payment Authenticator key pair.
Replace <vpTokenResponse>, <walletUnitAttestation>, <walletUnitAttestationPop> and <transactionDataBase64> with the actual data obtained in the previous step. You can run the JSON code block below using the Run button.
Request
Response
Try It Yourself (With Demo Video)
Watch the below demo to learn Payment Data Confirmation workflow and try it out yourselves:
: